background

Wednesday, June 29, 2011

Tuesday Trigger Inspired by Stamp It Cards!


One of the things I LOVE about the Tuesday Trigger at Moxie Fab is that it often helps me overcome scrappers block. I have a niece getting married this October and I volunteered to make the bridal shower favors. I had picked up some DCWV 12 x 24 adhesive backed paper on clearance at JoAnn's with just such a project in mind. I knew I wanted to cut the paper purses from the Cricut Bags, Tags, Boxes and More Cartridge, and fill the purse with some hand made cards for the favors. So, last month I cut out 30 purses and scored them. Then set them aside, when I hit my scrappers block.


I knew I wanted to embellish the purse, but how? It could not be too detailed because I need at least 30. And then what to do with the cards? So, I saw Moxie's Tuesday Trigger and knew what I wanted: Doilies! Below is the Moxie Fab Inspiration Card: Merci by Tina Fussel.


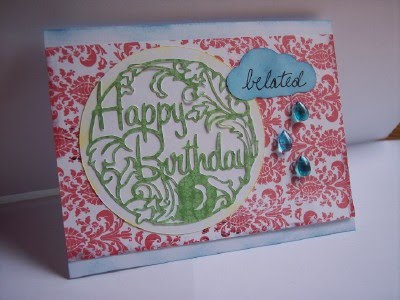
Oh, doilies are such a big trend right now. Isn't this Die-Namics High Tea Doily fabulous tucked under the purse flap? And I have to tell you my ribbon story! I was out visiting a friends garage sale last month and stumbled upon a cookie jar full of gorgeous ribbon for $2.00. Ok, so if your counting I have spent $18.00 for 30 purses and 60 cards, and I don't need adhesive as the paper already has it! So, I am keeping the cards simple, just a bit of embossing with the Swiss Dot Cuttlebug folder, the thank you stamp is Close to My Heart Solo T, the Hello is SRM stickers. The brown flower is CTMH and white flower is also from Cricut Tags, Bags, Boxes and More. I love using my Cricut for such a mass production! I cut all 30 purses at my S.C.R.A.P. Guild meeting in June. So, quick and easy and just the thing to take to a crop! I can use the auto fill to cut my flowers and the use of squares and rectangles make the the cards quick and easy too! Now I need only make 58 more cards by the end of August!

Embellish Color Trends Challenge: Rainbow


Today I am trying a new challenge: Embellish Color Trends Rainbow Challenge.


My favorite fabric store: Tammy Tadd Designs, is going out of business. I will miss them so and I wanted to make them a card. For my card, I used my Cuttlebug Quilling Chrysanthemum and cut the colors so that the center is violet and working through the rainbow to end with red. I then added Anna Griffin trim to the card and added a bit of blue ink to the felt trim. The pink fabric, I bought at Tammy Tadd Designs. I am not sure of the manufacturer as it is just a scrap. I stitched it to the card and used my computer to print, "I will miss..." The inside says, "the way you brighten my day!"


Saturday, June 25, 2011

Tuesday Trigger: Lovely as a Lullaby


This weeks Tuesday Trigger at Moxie Fab is titled Lovely as a Lullaby and many of the entries are baby themed. But I saw that the colors would be perfect for a sympathy card, and to be honest it was a rough week and sympathy cards were needed! My card is at the top and Moxie's inspiration photo is just below.


I also was inspired by one of my favorite paper crafters: Sarah Martina. I used her card with the postage stamp and the flowers as a starting point. You can find her card picture here.http://sarahmartina.com/blog/category/blog-hop/ I used my Cricut Imagine and Audrey cartridge for the black paper and then cut it using Martha Stewart Seasonal Cake Art Cartridge. I stamped on this with Close to My Heart Treasures and Versa Mark. I used CTMH white embossing powder and added Art Glitter Faux Snow carefully with dots of glue on the flowers. I am so happy with this effect and was looking for a chance to use the snow! I just had no Christmas cards or pages to scrap, so I thought of the dandelions.


The yellow paper and teal papers are both Cricut Imagine Blossom. I also, am finding freedom in having an Imagine. When you pay for patterned card stock and live far from the stores, you may find like me that you are afraid to stamp, emboss, distress, or cut your paper but having an Imagine as freed me from this fear. I know, if I don't like me experiment I can just print another sheet. So, I find my self being more adventuresome with paper crafting!

The sentiment was made with my Microsoft Word in the Edwardian font, and just cut to look like a banner. I then folded the banner and this idea also came from Sarah's Blog! I added a button with a bow tied with crochet thread and called it a day.

Friday, June 24, 2011

Congratulations to My Fellow Robin's Nest DT Members!


I am so excited to make the design team at Robin's Nest! Watch for us at the Robin's Nest Blog. And would like to congratulate my fellow design team members! You will want to check out their blogs below as they are all very talented scrappers and card makers and each as their own style! I am honored to be considered as talented as them! So, without further ado here are the rest of the Robin's Nest Design team and links to their blogs:


Tenny Kusuma at Tenny's Crafty Life


Gini Williams Cagle at Beadz


Kristin Keller at Kris' Craft Coop


Jan Hennings at Paper Craft Pleasures


Peg Rounds at Peg's Crafting Corner


And a guest designer: Irit Shalom

Now, the details on my card above (please click on image for a larger view):

Paper: Robin's Nest White Glitter Silver Dot
Stamp: Baroque Motifs Stampin Up
Embossing Powder (for stamped image Stampendous)
Ink: Tsukineko
Sequins: Michaels
Title: Cricut Elegant Cakes
Silver Glitter Cardstock: Best Creations Inc
Teardrops: Robin's Nest

Monday, June 20, 2011

Loving Robin's Nest Products & Design Team Tryout!


While keeping up on my paper addiction, I came across a new product line called Robin's Nest! And to my delight, they had an open call for their design team! So, I checked out their website and loved their products!


Here is a fourth of July page I made up with their paper and embellishments. I started with the back ground paper: Blue Stars on Red. I then cut a medallion using my SCAL 2 to look like a circle with patriotic bunting. I am sharing the svg HERE. To the medallion, I added some of the Robin's Nest Freedom Tear Drops.


I love the Robin's Nest Journalling Blocks! These two are is in the Glittering Blue Journalling Kit. I used one to mat my title, "Independence" Day, which is cut from Robin's Nest: America Words paper.


I also used the White Glitter Card stock, Silver Dot in my rectangle in the center, and their Canada Stripe Glitter card stock too! Finishing details are the Robin's Nest blue & silver glitter fireworks, I paper rosette, covered with a stamp by My Mind's Eye, Stella Rose: Gertie "Girly" Stamps, a button and more the Robin's Nest Tear Drops in Red!


For a fun pop of color and to reinforce the patriotic theme I added them to the journalling block. Silver letters are K & Co.

You can visit the Robin's Nest Blog here and see more of their items and be inspired. I also made a card to submit for the Gallery Star at Paper Crafts Magazine. It's my understanding that the submission for their contest may not be published elsewhere, so if you would like to see how I used my Robin's Nest paper you can see the photo in the Gallery Star Flicker Group Here. I used the Canada Stripe Robin's Nest Paper, Cricut Beyond Birthday's cartridge, and My Favorite Things Pure Innocence Flower Girl Stamp. To make my girl more patriotic, I punched the stars out with a paper punch and made her flower into a flag using the Cricut Martha Stewart Seasonal Cake banner. I colored the banner with the stripes and added the star with a scrap of paper and the same paper punch. I drew her hat to look like a sailor's hat and added the stripe detail like the stamp and the star.

Friday, June 17, 2011

Thankful Thursday Challenge at Crazy About Cricut!


Yes, another challenge! This time at Crazy About Cricut. I needed another Father's Day card, and really how much more thankful can you be? Aren't we all thankful for our parents?! So, I am submitting this card for the Thankful Thursday Challenge.


I started with my Cricut George Cartridge and used the framed talk bubble. Into that I used a silhouette from Nursery Rhymes. I found it on clearance at Michaels! I welded them using my DS and then transferred the file to my Gypsy so I could cut it on my Imagine. I love the detail my Imagine can cut and new it would be best for the detail in this card. Now the quote is from Season Cake Cartridge. I then used my paper trimmer, and scissors to trim off the bottom of the talk bubble.


I have to say that it is the Friday before Father's Day and I am just making this card and mailing it today! So, Dad you will be getting an email to direct you to this blog so you can see your card on Father's Day! I am so thankful for you! Happy Father's Day!

Wednesday, June 15, 2011

The Paper Variety Challenge #38 Mixed Alpha's


Am I making you crazy with all my challenge entries? I hope not! These are all cards I needed to make anyway, so why not win a little blinkie for my blog! Yes, my large family upbringing is showing up. I love competitions and even better winning once in a while!


So, tonight I am trying a new challenge blog: The Paper Variety. The challenge this week is to make a paper project with 2 or more text types. So, my entry is the Father's Day card above. I used my Heritage cartridge in my Imagine to print the papers. Then the silhouette is made with A Child's Year and George and cut with my Gypsy (welded first). I used some alpha stickers (not sure whose) I had in the stash and the sentiment is from Wild Card Cartridge. Now, I actually ran out of red ink in my Imagine and did a little high lighting with my markers to cover the light spots. And I love the look! A bit of ribbon and more patterned paper cut into a strip and a quick and masculine card!

Tuesday, June 14, 2011

Pink Camo Covers and a Challenge at Scrappin With Cricut


Just finished up two covers for a customer: An expression cover and an Imagine cover and am submitting them to the challenge over at Scrappin With the Cricut. If you are a serious Cricut fan, or paper crafter, check out Dusti's blog! This is for the No Cards or Layout Monday #3 Challenge. You really need to see what Dusti made with hat boxes and Mardi Gras beads!


My customer, only requested pink camo be in the covers. I chose the rest of the coordinating fabrics. So sweet! Who knew pink camo could look so good! She did! You paper crafters are talented!

Monday, June 13, 2011

Case Study Challenge #43


Now that I have discovered card making, I often feel the need for a little help and I already visited Moxie! So, I took a look at some of the challenge blog's the Moxie crafters submit to, and found one called Case Study Challenge Blog. At the top of this post you will see the challenge card, created by Jill Foster.

I love their latest challenge and decided to try out the Imagine again! This time, I knew I could print to fabric, so I thought...why not print on ribbon! First rotated Jill's layout and tried to determine where on the card I wanted my ribbon and where on the ribbon I wanted my sentiment. I chose 4" from the left side of the card.

I did a test print on card stock, then taped my ribbon on top with some temporary tape and ran it through the Imagine on PRINT ONLY mode using my Straight from the Nest cartridge, filled with black at 1/2".

I printed images from my Imagine More Cards cartridge using the layers feature and choosing only the portions of the images I wanted. Even the card back ground is from Imagine More Cards. I then inked the edges with some black chalk ink and added a little pink trim.

I made this card for my Grandmother in Law who slipped and fell last week. Hope this will cheer her up as she recovers!

Sunday, June 12, 2011

Pooh & Friends Cloud Challenge at BBTB2


This week's challenge at Bitten By The Bug 2 is: Pooh and Friends Cloud. And once again, you don't have to have the exact cartridge, but can use any cloud. So, I used this one from Indie Art in a Belated Birthday Card. The sentiment inside says, "Sorry we missed your birthday! Hope we didn't rain on your parade!" There is no belated birthday in the Cricut cartridges (that I know of), so I just hand wrote it in my cloud. The patterned paper is made with Audrey cartridge in my Imagine.
I cut the Happy Birthday doily using Paper Lace and my Imagine. I am over the moon with happiness over the quality of the cuts from my new Imagine! This lace piece is cut for an A2 card and can you believe the detail! I think this is better than my Expression or my original Cricut!

Saturday, June 11, 2011

Tuesday Trigger at Moxie Fab: Cosmopolitan Neopolitan


When I first saw this weeks Moxie Fab Trigger, I was not terribly thrilled to try this challenge. But this weekend, I took a look at the entries and became inspired to create something dessert like. I remembered this bit of fabric I had in my stash that reminded me of dessert! And pulled it out.


You see, I have entered quite a few Moxie Fab challenges and Tuesday Triggers and loved every thing it has inspired me to create, but I have not won that blinkie! So, I thought why not use a medium I am more comfortable with on a card? Fabric! This fabric is Westminster Fibers: Scroll. The tag is cut with SCAL 2 library of tags, and the sentiment is from Close to My Heart: For Every Occassion. The ribbon is from Hobby Lobby! Maybe, being Moxie Fab, is just about beautiful supplies in a simple arrangement. So another card, inspired by Moxie that I am happy with and I hope will let my friend know how much I miss her!


PS. I used this fabric in a cover for a Cricut Cake Machine.


Wednesday, June 8, 2011

Beautiful Eva by Basic Grey for Moda Cover!


I love that I can paper craft and sew with Basic Grey! This cover is made with Basic Grey Eva fabric for Moda. I chose not to make my typical embellishment on the flap, because I just wanted to see the Basic Grey fabric. You can find this cover for sale at my Scrapincovers.etsy.com shop!

Sunday, June 5, 2011

Tuesday Trigger: Clasically Modern


This weeks Tuesday Trigger at Moxie Fab World inspired this card I made for my sister. She is only a year younger than I and is scheduled for hip surgery in a few weeks. I wanted to wish her well on her surgery and let her know how much she means to me! She inspires me to be a better person, so I used my Close to My Heart Solo I stamp for the Inspire and the silver letters may be K & Company. The Good Luck is also from Close to My Heart: For Every Occasion.

The medallion was made with my Cricut Imagine, Martha Stewart Seasonal Cake Cartridge filled with the Audrey pattern cartridge. I decided I wanted a white center, which the Imagine, won't allow you to do, so I used a stamping technique and punched a white piece of paper to mask the area, I wished to remain white. I taped it on the card stock with temporary adhesive and ran it through the Imagine. Then I removed the circle and stamped in the white space. The circle window over Good Luck is also Close to My Heart.

Saturday, June 4, 2011

BBB2 Celebrations/Cake Challenge


Tonight I am trying a new challenge blog: Bitten by the Bug 2! Why haven't I tried this one yet?! The inspiration cartridge is Celebration, which I don't have, but the challenge say any cake, so I used the cake from the Cricut Wedding Cartridge. I cut it in white and then ran it through my Cuttlebug Swiss Dot folder. Love the swiss dot folder! Then I cut the trim in black and cut my rolled roses in red. The rolled roses are cut with a My Favorite Thing: Die-Namics die called Mini rolled roses. I cut the swags with Martha Stewart Seasonal Cake Cart in black after scaling them and weldding them to cut as one object in my DS. I glammed the black trim up with some of my Stickles.


The medallion is the again Martha Stewart Seasonal Cake Cart and the stamp is from Close to my Heart: Now and Forever. The black glitter paper in the back ground is Reminisce: Graduation Black Swirl. Pearls are unknown as they have been in the stash forever.

Thursday, June 2, 2011

Moxie Fab I'm Sew Excited Challenge!


So, if you visit my blog you know I love to sew and that I love Moxie Fab! So, when I saw the latest challenge: I'm Sew Excited! I knew I had to enter this one. And the post says the item can be a home decor item...so, I am submitting this decopage sewing box I made. I found it at an estate sale and covered it with My Minds Eye: Lost and Found Paper. I used an SU stamp set called "Chic Botique", a felt rolled rose with My Favorite Things, Mini Rolled Roses Die, a zipper flower, a zipper pull for a leaf, a rolled flower cut with my SCAL 2, bling is Want2Scrap and some lace scraps. I even found a great sticker dress form for the inside embellishment! Isn't it a great way to glam up your sewing kit?!

LinkWithin

Related Posts with Thumbnails