background

Friday, March 30, 2012

Fabulous at 500 Celebration & Give Away


I just reached 500 followers on my blog! So, in honor of this milestone, I am going to give away five prizes! Below is a list of the prizes and details on how to win.

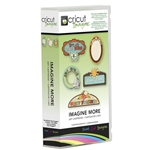
1) Cricut Imagine More Cartridge (never been used, unlinked with no reward points). I got this when my original Cricut Imagine was replaced.
2) Cricut Imagine Best Friends cartridge (never been used, with no reward points, and unlinked). Ooops, I bought something I already have!

3) A $10.00 gift certificate to one of my Etsy stores. These stores offer dust covers for Cricuts and other brands of machines, as well as scrap bags and a few embellishments. I will honor this gift certificates for a custom order!
4) A $15.00 gift certificate to one of my Etsy stores. I will honor this gift certificates for a custom order!
5) A $20.00 gift certificate to one of my Etsy stores. I will honor this gift certificates for a custom order!
So, now how to win? You do NOT need to follow my blog to win. Just leave a comment and tell me the following: 1) Do you want to be in the Imagine cartridge or Etsy giveaway pools? And either step 2 or 3. 2) Please visit my Etsy stores; using the links to the right, and let me know what your favorite item is in your comment along with your contact info, or 3) Visit this blog post using Heartfelt Creations dies and make a comment about this page with your contact info in a safe manner. For example, ssmitch at hotmail dot com will help prevent spam.
So, you will need to leave one comment here is you visit one the Etsy stores, or one comment on the Heartfelt Creations blog post if your not interested in visiting my shop. Be sure where ever you comment to let me know which drawing you want to be in: Cricut Imagine or Etsy Gift Certificate. Thanks to all of you who care enough to follow, it is a wonderful thing to see you like my blog posts! I will draw a winner on April 5, 2012.

Wednesday, March 28, 2012

Work the Stash Wednesday with Moxie's Practical Solutions


I am once again working my stash this Wednesday. And I checked to see what challenges Moxie had cooking...yes they have one perfect for the stash of scraps: Practical Solutions for the Paper Crafter: Paper Scraps. And unfortunately, I am in need of another sympathy card. So I pulled out some scraps from The Robin's Nest, Pink Paisley, and Basic Grey ribbon and made a card with little banners.
To this I added a text box made in Microsoft Word and trimmed with some pinking shears. I wanted to add a bit of shabby chic goodness and something with a little love for recipient. This is a scrap of the re-embroidered lace from my wedding dress. What am I saving it for? Shouldn't it go to those I love? I don't have enough for an entire dress and no daughters, so I am moving on and working more than just the paper stash. And be sure to check out the other entries at Moxie Fab World! As you usual, the paper crafters who have entered the challenge have me oohing and aaahing!

Friday, March 23, 2012

Using Square Punches in Circular Paper


Once again The Robin's Nest has teamed up with Purple Cows to share fabulous products and projects. Today, I am sharing how to use a "square" punch with paper circles. The Purple Cows punch is actually not limited to squares, but the guide lines on the punch might lead you to think so. So, I'm sharing my tips on getting the best looks when working with these punches and circles.
1) Always practice on scrap paper! I keep a purge pile handy for such practice punches filled with paper that I will never use on pages. These usually come from paper stacks or kits that I purchase.
2) Use regular intervals. On the page at the top, I centered the Purple Cows Craft Geek Winter Punch It in the middle of the cogs on my cut from the Cricut Elegant Edges. For the circle quilt medallion, I drew lines on the back of a circle in the middle and then in between. I lined the punch up with the lines and punched around the circle, I flipped the circle and lined up my original punches with the mirror image guidelines on the punch. I love how the image created looks like a quilt block!
3) Be Consistent in your placement from the edge of the motif.


To finish the medallion on the scrap book page, I added The Robin's Nest Dew Drops to the Purple Cows punched motif and sewed a circle in the center (hard to see sewing after adding pictures). I added the title from the Martha Stewart Season Cricut Cake Cartridge, cut with more of The Robin's Nest Paper.
For the background paper, I used plain white card stock and The Purple Cows Roll it Dots ball, in three ink colors to pull together the three colors of The Robin's Nest paper I used. It also helped my white card stock to not look so stark against the other colored papers. I love this tool and the space filler in me will definitely be using it again!
The eggs were cut with the Cricut Easter 2010 Cartridge, and then punched with the Purple Cows Punch it Winter tool. I played with the white egg to make it look like the fabulous Ostrich eggs we once saw in Switzerland. On top of the eggs, I added some more of The Robin's Nest Dew Drops.
Supply List
The Robin's Nest Distressed Honeycomb Paper
The Robin's Nest Shocking Pink Sorbet Glitter Paper
The Robin's Nest Glitter Blue Raspberry Sorbet paper
The Robin's Nest Pink Coral Mini Dew Drops
The Robin's Nest Under the Sea Dew Drops
The Robin's Nest Cotton Candy Dew Drops
The Robin's Nest Hydrangea Dew Drops
Purple Cows Craft Geek Punch It Winter
Purple Cows Craft Geek Punch It Spring (Quilt block)
Purple Cows Roll It
Ink
Fine point pen
Cricut Martha Stewart Seasonal Cake Cartridge
Cricut Easter 2010 Cartridge
Inkadinkadoo Mindscapes Stamp (Butterfly)
Journaling block (I got this from a swap so no source known)

Wednesday, March 21, 2012

Work the Stash Wednesday with Moxie Fab Feathers


I had to make one more item for my fashion inspired Fascination Feathers Challenge Entries at Moxie Fab World. I do not mean to be a challenge hog, but sometimes I am so inspired that I feel compelled to try all of the ideas that Moxie inspires!
This one is using the Hampton Art's Graphic 45 Stamp Steam Punk Cling Set. I wanted to use feathers with the angel wings on the dress form. I was in need of some sympathy cards and thought it reminded me of angels. Now, I am stressing over the dress form in the image. Do you think it is appropriate for a sympathy card?
And yes, I worked my stash! The back ground teal paper is some Club Scrap paper I have had forever!
The label is made with The Robin's Nest Ocean Fleur paper, printed with the Cricut Imagine using the Elegant Edges (label shape in brown), and the Heirloom Imagine Cartridge. The With Sympathy is also a Cricut cartridge: Wild Card printed with the pattern from Heirloom cartridge again. This is my newest obsession, printing on my patterned paper with the Cricut Imagine to get a custom label look. The frond is a Martha Stewart Cake Cartridge, but cut so long ago that it was in my die cut stash and I will have to get back to you on that! The ribbon is Making Memories.

Saturday, March 17, 2012

Fashion Feathers Collection


A good fashion designer offers a collection of items that coordinate and so I am gonna jump into another entry for the Moxie Fab World Fascination Feathers Challenge, I really think that an artist often has several ideas and works through a series and Moxie Fab World has once again given me many ideas to create!
For this entry I used a stamp by The Angel Company called Natural Dream. They are actually no longer in business, but I love this silhouette stamp and thought it would be a perfect foil for the feather challenge! I just slipped a feather into the hair and added some silver lace trim by Anna Griffin. The black label and Silver Fleur de lis paper is by The Robin's Nest. The Love rub on is Making Memories.

Friday, March 16, 2012

Fabulous Feathers at Moxie Fab!


Sometimes I think that Cath has a bat phone and she calls my brain with scrap booking and card projects! This week, Moxie Fab has a Fascination Feathers challenge! Can't you just see the fashion designer in me saying, "I am trying this challenge!"
So, I pulled out my Cricut Forever Young Cartridge and cut a silhouette in black card stock. I added some feathers, recycled from my son's Angry Bird Halloween Costume. Oh, yeah, I'm a recylcler! I added the sentiment from K Andrews Art Stamps Fashionable Friends, and some ribbon from American Crafts at the waist and my beautiful card is finished. Thanks Moxie Fab World!

Wednesday, March 14, 2012

Work the Stash Wednesday with BG & SRM


I have been a Basic Grey and SRM Stickers fan for awhile, and there are lots of scraps in the stash as a result. So, this Wednesday I set about using some of those scraps for cards. I wanted to use some of the large letters from Vagabond, by Basic Grey and they are too large to use make an entire word on an A2 card. So, I used the first letter of the word instead.
Here are the results. The large letters and papers are all Basic Grey and the baby cards are made with SRM stickers. Did you know that Basic Grey offers their older lines in digital formats? So, if you have an old favorite, or are new to BG and love their older lines, just visit their online store!

Monday, March 12, 2012

1st Communion Invitations with Cricut Imagine


Today, I am sharing my 1st Communion invitations made with the Cricut Imagine and sharing with Erica's Craft Room how I got into Cricut. Did you know that if you stop by Erica's and check out this post you can find out how to win a Sophie cartridge?
I have a fashion design background and have sewn since I was in my teens. While working in apparel manufacturing, I worked with Computer Aided Design software for clothing, and saw the cutters in use on large football length tables.
I started scrap booking shortly before the birth of my first son, because I have always love creating and loved the idea of scrabooking memories of my loved ones. I had a friend with a scrapbooking business and a Cricut and was sooo excited to see that the technology used in my job, was now available to use in my home for my hobby! I saw immediately the professional quality available and LOVED that the Cricut Design Studio software would allow me to continue using Computer Aided Design for my own tweeking. I got the Original Cricut and within 6 months the Expression. I now have an Imagine, which I used for the invitations above.
I used the Creative Memories Reminisce Accents Cartridge for the spokes on the cross, the center medallion is made with Paper Lace, and the rectangle with good old George, Basic Shapes. I created the image with CCR and printed them out. I then ran them through my printer and used Microsoft Word for the Text. I hand cut the slits for the ribbon using my Creative Memories ovals and the cutting cogs. The slits around the center medallion were cut with a paper trimmer.

Saturday, March 10, 2012

Using Fabulous Fashion Trends on a Page


One of my all time favorite fashion trends is Men's Wear details for Women's clothing! So, when I saw The Robin's Nest Classified Line I had to have it! And how fabulous is the black, yellow, grey and white combo!? I am entering this in The Play Date Cafe's Challenge #122. Here is the color story inspiration photo. So, how do you use this trend on a page? Try small patterns, like the Mens suit stamp paper. Use small feminine details, like the Purple Cows Spring punch and use a classic color combo like the one in this page.
This month The Robin's Nest Design Team is doing a swap with Purple Cows. I was sent several punches and a stamping tool. Here is my first project with The Purple Cows Craft Geek Punch It-Spring tool. I love that you can use this tool any where on the page, and rotate it to make multiple designs. The possibilities are endless!
So, here are the details of this project. The background sheet is The Robin's Nest Distressed Honeycomb paper. On top of that is layered The Robin's Nest Mens Suit Stamp. Before I adhered the Men's Suit Stamp, I used The Purple Cows Spring Punch it to add the border detail on the left hand side. To use this along the length of the page, you need to roll the paper under the punch. Since, The Robin's Nest paper is such a heavy weight paper, I rolled the paper in the opposite direction when my punching was finished and it laid flat again. The Mens Suit Stamp was then sewn onto the Distressed Honeycomb paper with a zig zag stitch.
The title was created with the Cricut Imagine and Cricut Craft Room software using Graphically Speaking, and Elegant Edges. I used the print only mode for the Top 10, and the black border around the reads). I then used the cut only mode for the rest and cut the yellow label in The Robin's Nest Honeycomb Linen Fleur Paper.
The library cards are a free printable I got from a favorite Etsy Shop: Sweetly Scrapped Art. Be sure to check out their blog using the link in the supply list below.
The stamp is Inkadinkadoo and on top of the dots in the image, I added The Robin's Nest Black Dew Drops. They add the perfect bit of fashion glamour to balance the yellow in the page. The key to using yellow is small doses. I added a bit of black Stickles to the smaller dots on the stamp too.
The photo on the page is our local library. I so wanted to scrapbook this for my children, along with a list of our favorite children's books. What wonderful memories I have of my childhood library and reading. I so hope my children grow to remember our library fondly!
Supply List
The Robin's Nest Distressed Honeycomb Paper (Backgound)
The Robin's Nest Honeycomb Linen Fleur Paper (reads title & Behind punched border)
The Robin's Nest Men's Suit Stamp
The Robin's Nest Classified Die Cut Shapes (under Sycamore Library)
The Robin's Nest Classified Stickers (center of flower, library tag)
The Robin's Nest Solid Black Dew Drops
Purple Cows Punch It Spring Craft Geek Punch
White Paper Flowers
Yellow Acrylic Flowers
Inkadinkadoo Wellspring Stamp
Cricut Graphically Speaking Cartridge (Top 10 Reads)
Cricut Elegant Edges (Title Label in Honeycombe Fleur)
Library Cards free printable from Sweetly Scrapped Etsy Store
Silk Daisy
Sewing Machine & Thread
Distress ink

Thursday, March 8, 2012

The Robin's Nest is Sponsoring Challenges with Prizes!


I am so excited to share that The Robin's Nest is now hosting a monthly challenge with prizes for their on line store! If you like The Robin's Nest items and challenges you can enter HERE.

The Page Map Challenge; at the Chattering Robin's Blog, is a monthly challenge starting on the second Thursday of month and will last for one month. The winner will be announced the Sunday after the new challenge is announced. All winners will be notified by email and the winner will be announced on the Chattering Robin’s Blog and The Robin’s Nest Facebook Page. Entering into the contest you are giving the Robin’s Nest the right to use your project to promote the challenge on their blog and other Social Media sites.


Create your own page using the Page Map(s) – the page map can be incorporated vertical or horizontal in the layout. Any products can be used but if you use Robin’s Nest Papers or embellishments you will get bonus entries.


HOW TO ENTER:


Add your layout to the inlinkz tool on the Chattering Robin's Blog HERE. If you have a blog grab our button and add it to your blog post. A blog is not a requirement for this Challenge, you can use FlickR or any other Social Media Site to enter.


The winner will receive a $25 Gift Certificate to The Robin’s Nest On-Line Store!

Sunday, March 4, 2012

1st Communion Banner with the Cricut & Fabric


My youngest makes his 1st Communion this year and I am busy with working on craft projects for his special day. First on the list is the 1st Communion Banner. This will be hung on the side of the church pew. Our parish, gave us the cream banner and suggested we search the Internet for ideas. It had to have my son's Name and some 1st Communion images.
So, I got on the Internet and liked the idea of a church window on the banner. This church window is from Paper Lace. I used Heat and Bond and calico. I had to hide the smallest portions of the cut as the Cricut doesn't like cutting these smaller pieces. I used a fresh blade and placed the fabric face down on the mat. The heat and bond was face up on the mat. I taped the fabric at the corners of the mat, as the mat will NOT hold the fabric as well as it hold paper. The purple portions of the window are also fabric applied with the Heat and Bond.
I cut the chalice and the Pyx with the New Testament Cartridge. They are actually the same image, I just changed the cup to look more like the bowl that holds the host. This I cut in satin and it cut like a dream. I added a bit of dimension with my Rub-a-Dub marker on the cup
Next I chose to add some Art Glitter for the smaller portions of the window and my son's name. Ok, I confess, I cut this with the Cricut and I forgot to mirror the font! It was too small for it to cut well anyway, so I just cut it in paper and traced it onto the banner. I used the Art Glitter Dries Clear Fabric glue.

Friday, March 2, 2012

Homeketeers is Giving Away an Expression 2!


It's been a long time since I shared a giveaway, but today I'm sharing an Expression 2 and a Cricut Mini Giveaway that Homeketeers is holding in honor of National Craft Month. Now, I'm not sure when this giveaway ends, but you can find out how to enter HERE. The also have a great community and you can find great ideas Here.
They have also asked me to share a craft I have made as part of the giveaway, so I am sharing my son's 1st Communion Banner. And yes, I made with with my Cricut! You can cut fabric with your Cricut! The black glass window portion was cut with the Cricut. Stop back for my next post and I'll share all the details on how I made this project and cut fabric with my Cricut!

Thursday, March 1, 2012

St. Patrick's Day Birthday Card


I'm working on my St. Patrick's Day Birthday card today and am entering it into the Case Study Challenge #80. Please excuse my poor excuse for a bow as I am bow challenged!
I used the Storybook Cartridge and filled it with the Audrey Paper, the sentiment is from Wildcard. I cut some green gingham paper, and some black corrugated cardboard paper for a mat and added the ribbon and my card is done. Thanks for stopping by!

LinkWithin

Related Posts with Thumbnails