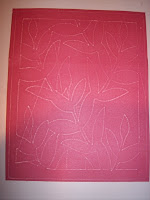
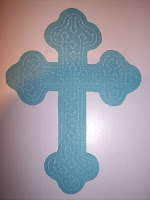
background

Wednesday, March 31, 2010

Scalloped Scallops! Straight from the Nest!


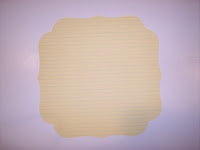
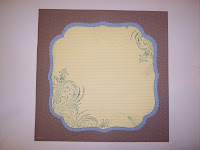
Just got my Straight from the Nest Cartridge from HSN. Don't worry, I used a coupon. Even so, it was a bit of a splurge, but I feel well worth it. Did you see the scalloped scallop edge motif? I always miss something when previewing in my DS and or Gypsy. So, when I get the cartridge, I like to browse the book carefully. Here is what I made with the scalloped scallop motif. I think you scrapbookers might enjoy this one. Perhaps I should have named my blog Scalloped Obsessed! Almost forgot, you will need George, Basic Shapes and Straight from the Nest. HERE is the file.

Monday, March 29, 2010

Dry Embossing with Your Cricut & Gel Pens


I don't know if anyone one else has thought of this, but I had this idea yesterday to try and dry emboss with my Cricut. Here's how I did it:
Supplies:
1) Cardstock with a different color core. I used Close To My Heart (Pink and white) in one example and Coordinations in another (Blue Cross).
2) Your Cricut Machine.
3) A foam matt from a Close to My Heart Stamp Set. These come with every CTMH set and help you get an even image when stamping with clear acrylic stamps. I also tried some packaging foam around the house and it was too thick.
4) A gel pen holder and gel pen. I used Amy Chomas'.
5) A fresh matt to help hold your CTMH foam in place
6) Double stick tape or painters tape to hold your cardstock on top of the foam. You could even use the hinge method, and tape it to the matt on one side.
7) A fine grit sanding block or paper.
Machine Settings
1) Speed should be slow, I used a three
2) Pressure is lowest setting on the dial. I used a one for CTMH cardstock and a 2 for Coordinations cardstock. There is no pressure adjustment for the gel pen holder.
Instructions:
1) Cut your cardstock as desired. I wanted to make an Easter Card and cut it a little bigger to trim down after the embossing (6 x 6).
2) Place the CTMH foam on your Cricut matt, smoothing it down to stick well while drawing with the pens.
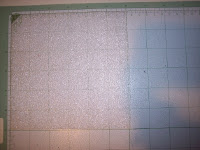
3) Place double stick tape on the cardstock on the right side of the paper, and place this on top of the foam in step 2. Again, smoothing it down. I used the wrong side so that you do not see the colored pen on the final image, but if you have a pen that no longer works, you could use it too!
4) Remove your cutting blade from your Cricut.
5) BEFRORE PUTTING YOUR GEL PEN HOLDER IN THE MACHINE, Load the paper.
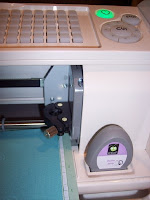
6) Still before putting in your gel pen and holder, move your blade using the arrows next to the cut button so that your blade is about 1/2" inside the cardstock edge in both the X and Y direction. This will keep the paper from tearing as the gel pen moves to start the "cut". If you are using DS make sure your image is not outside this 1/2" edge. If you are NOT using DS, use the Set Paper Size button before hitting cut.
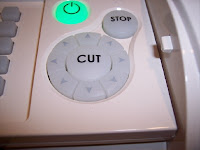
7) Put in the gel pen and gel pen holder, be sure to tighten the blade housing clamp.
8) Check that your settings are ok for speed and pressure and hit cut. Here is a picture of the drawn image. Notice the pen color is blue (click to see bigger) and that is why I put the right side of the paper down.
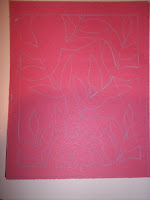
9) Remove the gel pen and housing
10) Unload the paper, remove tape and sand to reveal your embossing.
For some reason blogspot.com is not letting me add pictures. Find the pictures on the Cricut Message Board Here. And feel free to email me questions (find my email address in my blog profile.

Saturday, March 27, 2010

Journaling Marquee for the DS Users


Ok, HERE is a version for the DS users. You will need Storybook and George. Also, have fun playing with this idea. You will see when you open the file, there is a page for adding swirls with your pens. I used the gel pens and swirls from Storybook as well as stamps from Ink-a-dink-a-do. These stamps are called Dot Flourishes. I soooo love Inkadinkado! After I cut my Marquee and the scalloped background, I stamped again, then cut it down the middle length wise. I feel the need to have two page spreads with coordinating paper. Is it just me, or do other people feel this compulsion?!

Using Gel Pens for a journaling block


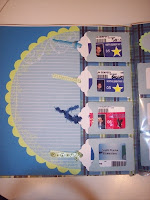
Just this last week I had an idea inspired by a purchased paper (see picture above) for my gel pens and holder for from Amy Chomas. I believe my store bought item was by Bo Bunny (it's glued down). And may I just say, this solves a design problem I have been mulling over for at least a year. I scapbook and want to be better about recording memories on paper. I like my writing and want to use it, but have always wanted to have straight lines that fit journaling blocks. Now, I figured out I can use my gel pens and make any shape and size journaling block with perfect lines! Here is what I did using SCAL2:
1) Created a straight line wider than my journaling block. I wanted my lines to go to the edge of the shape.
2) Copied the lines and pasted repeatedly, so that they were past the top and bottom of my journaling shape.
3) Used the align tool to center them.
4) Grouped them and moved them to assure they fit the top note shape.
5) Swapped my blade for the mini gel pen holder from Amy Chomas and hit cut.
6) Loaded paper a second time and swapped the gel pin holder out (back to the blade). Be sure to check your pressure if you want nice even lines. I actually like to do a test cut, as I am just getting used to these.
7) Cut the top note shape (this portion was originally created my Carla at Scrappedlives) Here is how the lined paper looks cut. To see the lines better, just click on the image.
8) Cut a scalloped top note to go behind the top note.
9) Stamped the edges with Fancy Pants Pollen Dust. Here are my pieces stamped and assembled, awaiting my journaling.

Like this file? Find it HERE in the SCAL2 format only. My Inkscape skills are limited and I do not know how to create this in a svg format. Sorry! I will try and work up a versio for my DS friends in my next post.

Tuesday, March 23, 2010

Spring is Here! Inspired by fabric again.


Just finished up this cover for a custom order. So Spring like! I love the details in this fabric and have some cut file ideas. Would like to pull out those gel pens again after seeing the white lines on the scallops. Isn't the embelly fun?! Now if I can just find the energy and the time!

Sunday, March 21, 2010

Gypsy Charging Station Idea


Every time I get a Currents catalog, I am intrigued by the cell phone docking station. My sense of organization, loves the idea of a place for everything and everything in it's place (then I can't lose it!). So, why not make a docking station for my Gypsy?

I used a paper holder (not sure what it is really called) that I bought years ago, while writing my masters thesis. Here is the side view.
I drilled a hole in it where I wanted to poke my Gypsy cord thru and began to embellish my docking station. I wanted it to match my MP3 speakers which I had already embellished. So, I covered the grey base with black Quickutz vinyl, adhered matching blue paper, stamped white paper with Ink-a-dink-a-doo Bold Damask stamps. I got these on clearance at Michaels. I used the CTMH Dutch blue ink.
To hold the Gypsy, I cut a clam shell from my latest Cricut Cartridge. I love the idea of recycling, and that it is clear so you can see the pretty stamping. Also, I did not have to worry about my Gypsy tipping over while charging. I used my scissors to cut it apart carefully, and then my paper trimmer and exacto knife. I cut just below the lip of the clam shell as straight as I could. I then sanded the edges with a fine grit sandpaper, so it would not be to sharp. I used the Provo Craft Traffically Tacky tape to adhere this to my docking station.

Side view of the clam shell glued down below.


Above, you can see how my charging cord come's through. To store more of my Gypsy cords, I reused another clear packaging item, from Kurio that once held some glittered letters. Adhereding it using the PC tape. Here is a picture of my MP3 player and speakers that match my Gypsy Charging Station.
I have always loved blue and wanted a blue and white craft room. I am happy that the blue matches the blue display screen on my MP3 and the power light on my Gypsy. I have also added green to my craft room color scheme to express my passion for my Cricut!

Saturday, March 20, 2010

Another Fancy Frame from Heritage


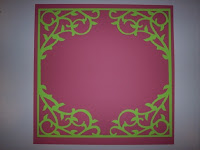
HERE is another design I made with Heritage. I love the beautiful scrolls PC has provided in their cartridges! Wouldn't this be perfect for an Easter page?

LinkWithin

Related Posts with Thumbnails