background

Showing posts with label Planner. Show all posts

Tuesday, July 12, 2016

Have You Found Scrap Our Stash Challenge Blog?


I am missing my favorite challenge blog and have been on the hunt for a new favorite.  I found a new challenge blog I love called Scrap Our Stash Challenge Blog.  First of all who doesn't need to scrap their stash?!  And the designers are so talented.  Add to that, I am currently working on my Quotes to live by scrapbook and their July Challenge inspired me to get a page done!
I have had a Dr. Seuss quote from this book on my list of quotes to scrap, so when I saw this month's challenge I had to give it a try.  I want my boys to know they can go far, and it's up to them!   Here is the Dr. Seuss quote I scrapped, "You have brains in your head.  You have feet in your shoes.  You can steer yourself any direction you choose.  You're on your own.  And YOU are the one who'll decide where you go..." Dr. Seuss, Oh, The Places You'll Go!  I used Microsoft word and inserted a text box for typing the quote.  The colors are inspired by Dr. Seuss.  Thanks SOSCB for helping me get another page done!

Supplies
Anna Griffin Planner
Anna Griffin Pop Up Card kit (rosette paper & Flower die)
Tim Holtz Rosette Die
Burlap doily
Buttons
Pink card stock
Purple card stock
Orange Card stock
Buttons

Friday, January 11, 2013

All That Glitters

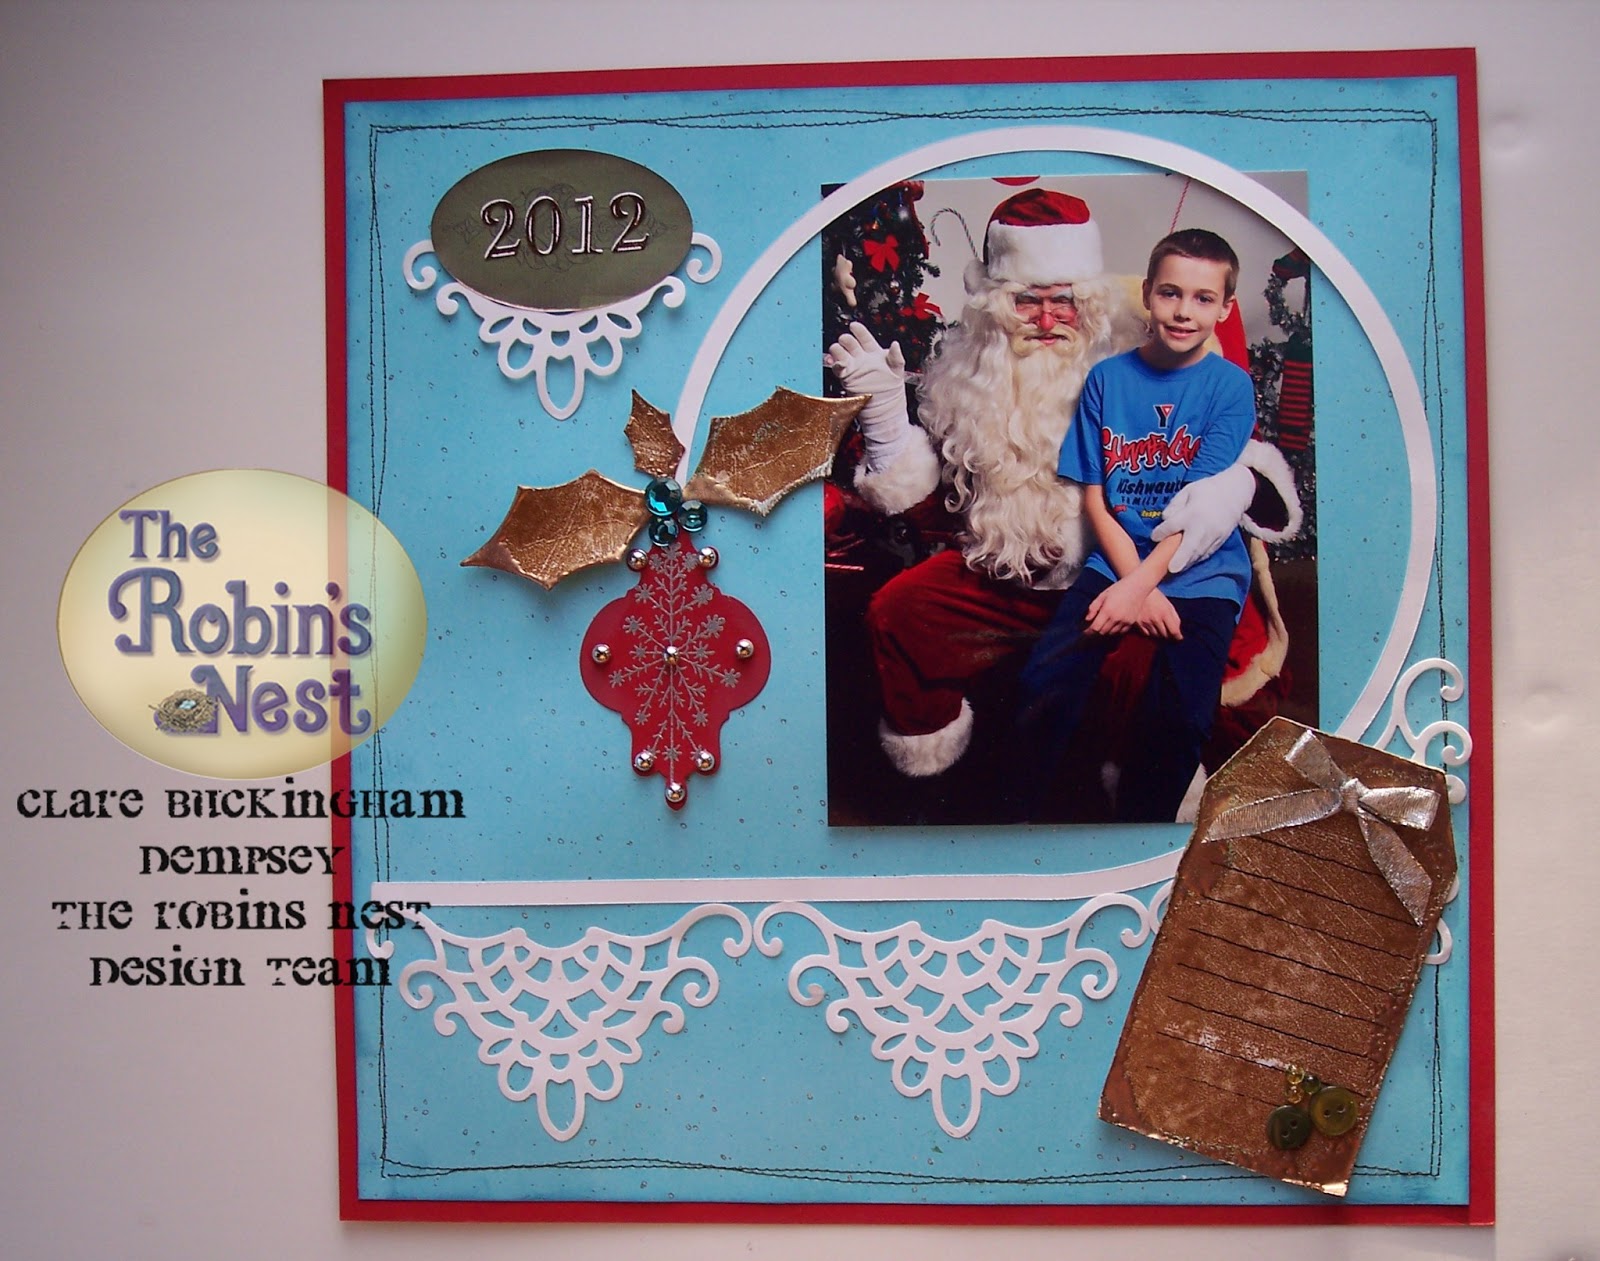
I am always faithful to scrapbook the Santa pictures and my Christmas photo cards when I get them.  So, today I am sharing this years photo with Santa page.  This is the perfect season to use all that glitters with beautiful papers from The Robin's Nest, and beautiful stamps and dies from Heartfelt Creations!  I started with a plain piece of red card stock and stitched a sheet of The Robin's Nest Teal Glitter Card stock on top.  I wish you could see this glitter card stock in person, as pictures just don't do it justice!  It is more of an embossed look with flecks of silver embossing on top of the card stock and The Robin's Nest offers this in multiple colors.  I want them all!

On top of the base papers, I cut a circle with a tail using Sure Cuts a Lot software and hung the Heartfelt Creations ornament from the circle.  To make this embellished circle cut, you can just think of the circle as a clock face and cut it at 9:00, then make a straight line from 6:00 in a clockwise direction.  The ornament was made with Heartfelt Creations HCPC 3335 Elegant Snowflake Medallion Pre-Cut Set and Heartfelt HCD 705 Creations Holly Ornament Die.  I used Silver Dew Drops from the Robin's Nest.  I also cut the holly leaves with the HCD 705 die. 
The tag is from The Robin's Nest, and I cut up the holly leaves from other tags to repeat the use of this beautiful copper colored paper. I embossed both the leaves and the tag with Piccolo's Vintage Copper Enamel Powder.  It is so rich looking with The Robin's Nest tags!
The title is made with an oval tag from The Robin's Nest Animal Tag Sticker set.  I love when I can use a sticker set in more than one theme.  The numbers are also The Robin's Nest:  gold glitter letters.
I cut four scroll shapes using Heartfelt Creations Perfect Petals Die and put three under my circle shape.  I then trimmed the top two curls off of the last shape and used it under my title.  This is a great way to repeat a design and make it the right scale for your needs.  It is also a great way to stretch your dies to cut more than one shape!  And while we are talking about dies, I want to give you a tip on how to use the beautiful detail dies you find at Heartfelt Creations.  Cover the die with clear packing tape, so that the sticky side faces the cutting edge.  Run the die through your die cutting machine with some scrap paper and you will now have the NON-stick side of the tape facing up in the die cutting side.  This will make removing your paper from the die a breeze!
Be sure to check out The Robin's Nest Store this month for specials on their card and tag kits for 20% off.  Here is a link for the sale items.  Use the coupon code cardkitpromo.  I love to make up my birthday cards for the whole year in January.  Why not use these kits to get your own cards made?


Supply List
The Robin's Nest Teal Glitter Card stock
The Robin's Nest Glitter Gold Letters
The Robin's Nest Safari Tag Kit
The Robin's Nest Black/White/Silver Dew Drops
The Robin's Nest Poinsettia Dew Drops
Heartfelt Creations Perfect Petals Die Template
Heartfelt Creations Holly Ornament Die Template
Heartfelt Creations Elegant Snowflake Medallion PreCut Set
Red Card stock
White Card stock
Stampin' Up Journaling stamp
Stazon Black Ink
Buttons
Vintage Copper Enamel Powder by Piccolo
Enamel Powder Adhesive in roll on bottle
Sure Cuts A Lot Software (optional-Circle with tail, may be cut by hand)
Ribbon
Teal Rhinestones
Silver ink
Silver embossing powder
Sewing Machine (optional you can use a marker)




Saturday, June 16, 2012

Cricut in Our Names Blog Hop Day 2


Add caption


Welcome to the Cricut Blog Hop day two,  hosted by Erica's Craft Room!  If you are just stopping by my blog and want to start at the beginning of the hop, you can start at Erica's HERE.
Today I am working on my 2012 planner pages for August.  I bought a kit from Archivers and have used my Cricut to finish up the pre-made pages with the finishing details to match.  For the August page, all of the images cut in orange are cut with Accent Essentials:  the arrow, fleur de lis, and cog.  I love how quickly my pages get done with my Cricut, how professional they look and how timeless the images are!
And to help celebrate this hop I am offering a prize too:  a $10.00 gift certificate for either of my Etsy stores where you can get a dust cover for any of your Cricuts!   To enter the prize drawing for my blog, please leave a comment below with a method to reach you, in a safe manner.  For example, ssmith at hotmail dot com will help prevent spam.  I will draw a winner on June 18, 2012.
Now for the line up of the Hop

Start http://mycricutcraftroom.blogspot.com/


Jenny http://www.crazyaboutcricut.blogspot.com/

Cindy http://www.cindys-greencricut.blogspot.com/

Clare http://www.cricutcraftyclare.blogspot.com/

Erica's Projects http://ericasprojects.blogspot.com/

Christina http://cema1cema.blogspot.com/

Robin http://custom-comforts.blogspot.com/

Tangee http://www.kricutkrazy.com/

Blog Candy http://ericasblogcandy.blogspot.com/

Sunday, June 10, 2012

Third Time's a Charm

Today I am trying out for my third term on the design team for The Robin's Nest.  I love their paper and embellishments!  So beautiful, elegant, timeless and pretty!


One of my all time favorite papers at The Robin's Nest is the Fleur and they have it in six colors!  So, I wanted to use one of my favorite color combos:  cobalt blue, yellow and white and my favorite paper from The Robin's Nest to make up my 2013 planner!  Now, you might be asking, 2013!  Already?  But if you have kids just ending the school year, you have been sent a copy of next years school calendar and you want to start planning.  And I love planners, ok I am addicted to planners, but often am frustrated that they do not have the right size or information that I want.  So I am making my own.
I started by creating the calendar pages in Microsoft Word and printing them out on heavy card stock.  I then made my cover with The Robin's Nest Blue Fleur, Tropicana Fleur and Yellow Sunshine Glitter Chipboard.  The 2012 is cut with Cricut Elegant Cakes and the resin flower is Anna Griffin. The border is Martha Stewart.  For the inside of the front cover, I used the striped side the the Blue Fleur and a bit of the Robin's Nest Blue Glitter Journaling to get the look of lace.  I liked this look so much I cut up more and used it on the back inside cover too!
I made a pocket page using October Afternoon.  If you make a pocket page for an album, try a double sided paper for this and just score your page.  Instant coordinating paper!
For the inside back cover, I used another of The Robin's Nest Blue Glitter Journaling blocks to label my planner, in case it gets lost.  I added the photo mat in the Blue Fleur and the Blue Glitter Journaling.  The back outside cover is more Blue Fleur matted on Distressed Honeycomb.
Supply List
The Robin's Nest Tropicana Fleur Printed on Linen
The Robin's Nest Blue Fleur Double Sided
The Robin's Nest Distressed Honeycomb
The Robin's Nest Glitter Daisy Honeycomb
The Robin's Nest Red/Blue Journaling
The Robin's Nest Yellow Sunshine Glitter Chipboard
October Afternoon Main Street paper
Yellow card stock
White Card stock
Microsoft Word
Anna Griffin Resin Flower
Martha Stewart Iron Gate Border Punch
Binding Wires
Cricut Elegant Cake Cartridge
We R Memory Keepers The Cinch

Monday, January 2, 2012

A Change of Plans for My Planner 2012


This year when I went to Archivers to get my 2012 planner, they no longer carried my favorite planner. The sales associate showed me one by Pinecone Press and it was pretty enough to me to purchase. The papers are by My Minds Eye. I am still missing my old planner, but hope this years planner will be more of a keepsake for my boys.
My previous planner had drop in page protectors for each month. I would reuse the pages from last years planner when the planner changed. But this year, my pages won't fit size wise or color wise. So I will be scrapping as the year progresses. For January I am using the sketch from Once Upon a Sketch. See the sketch below. Now, my planner page is a bit pre-made. As a matter of fact the kit comes with sketches and supplies to finish the planner. But, even when I take a class or follow a sketch, I like to add my own touches. So, I am straying from the Pinecone Press kit and adapting the Once Upon a Sketch to fit my rectangular page.
To start, I pulled out my French Manor Cricut Cart and cut my clock face. The title is License Plate Stickers by the the Paper Loft, the swirl is Prima, flowers are so old I'm not sure where they're from,and buttons from the stash.


Some things I just can't live without in my planner are the month overview, and a pocket for receipts. So, I made those and added them Pinecone Press, if you could add these next year, I think I could be persuaded to get your kit again!

LinkWithin

Related Posts with Thumbnails