background

Saturday, December 31, 2011

Happy New Year: 2012


Thanks for stopping by my blog on New Years day! I like to wish all of my followers and visitors a Happy New Year!
Are you making resolutions? I haven't yet officially, but I'd like to post more in 2012. So let's get started.
This is a page I created for my last family Christmas card for 2012. Well, it's hard to tell for sure since my family is so large. I hope to get some more late! I used My Minds Eye paper, Creative Imaginations Die (Red and White die), My Minds Eye chipboard sticker, Sizzix dies (green glitter) and Joys of the Season (White Pointsettia). I glammed up the white Cricut cut by adding some Art Glitter Berry Red glitter in the center. Over the glitter, I placed some Robin's Nest Dew Drops. I love the glitter under the clear colored dew drops! On the edges of the poinsettia, I used Art Glitter D25 Confection Dazzlers. I can't get over how professional and store bought this embelly looks and I made it myself!
The border under the photo mat is a Martha Stewart boarder punch I used at my friends last crop. She had a business of hosting crops and has wonderful supplies and organizational skills. She no longer hosts paid events, but has friends over once in awhile. I attended her New Years Eve crop and made the page there. Thanks Bridgette!

Friday, December 30, 2011

Advent Calendar Completed on Time


Well I finished all seven of my Advent Calendars on time! I am just getting around to posting pictures today. Not sure if anyone really wanted the CCR files, so if you would like them, please leave a comment I will get them to you.
Here are some close ups of my days. The Bell and the snowflake are both cut with the Cricut.
The sled is from Joys of the season and I filled it with color on my Imagine with Snow Angel. The cone is made with a DieNamics die from My Favorite Things and rolled together and stapled to make a cone. I used a glue dot at the bottom, as the stapler wouldn't reach. The banner is CTMH Art Philosophy filled with Snow Angel image, enlarged and centered using CCR.
The frame is cut with Fancy Frames cart in brown card stock, with a white black out image. My sisters can add any photo they wish or a bible verse. The red label is Snow Angel.
The teal ornament is also Snow Angel. The triangle box is a freebie from Craft Secrets and can be found HERE. I just added sticky back velcro to the bottom of the box, so my sisters and fill it with goodies next year!
The file folder is Sizzix die. I think this could be used for another bible verse, or tickets!


The Snowman is Snow Angel cart. The purse is Imagine More Cards and I made it with lip gloss in mind. Everyone needs some Berts Bees or Chapstick, don't they? I loved that I could get 4 of these boxes with CCR in one sheet of paper! If I cut it on my Imagine alone, it will only fit one on a single page.
The rosette was made by printing out the Snow Angel "sweater" paper, and cutting it with Tim Holtz's Rosette die. If you have Ribbons and Rosettes you could try this too! I just got the cart after I finished this, and still need to find time to play! The Christmas day was made with free sheet music image I found on the internet and the poinsettia I did NOT make with my Cricut. There must be a cartridge you can use for this! Try searching in the CCR for a poinsettia! The dress is made with a Sizzix die. I sold most of my Sizzix dies when I purchase my Cricut, but kept this one, as I love fashion images!
I just realized while writing this post, that I never took a picture of the whole calendar with every piece. Will have to bug my sisters for a picture and post later! I did not make my families Christmas celebration as I was at my husband's families celebration. My sisters told me that when it was time to open presents, they all asked to open mine first. Guess I'm doing well with my $5.00 budget!

Tuesday, December 27, 2011

Challenge at Fantabulous Cricut #91


Tonight I worked on a Get Well card for my uncle and am submitting it to the Fantabulous Cricut Blogs, Challenge Me Monday #91: Tags. I used my Imagine and the Mystical Garden Cartridge. I pulled out this cartridge, because the patterns remind me of my father's neckties and it seems masculine. I made my tag with George, Basic Shapes and embossed it with the swirls Cuttlebug folder. The sentiment was printed on my home computer and the border was made with Martha Stewart's Iron Gate punch.

Monday, December 26, 2011

Black and White Christmas Elegance


When I saw the Case Study Challenge #70, I knew exactly what I wanted to do with it: scrap book my sisters Christmas card! The inspiration card from the Case Study challenge has such black and white elegance (2nd photo), with a touch of teal and my sisters card had the same color scheme! I made this my own, by adding the deep red to the color scheme, and love the results (top photo)!
To get started, I pulled out my Cricut Imagine and my Damask Decor cartridge and worked in the Cricut Craft Room to make a beautiful circular motif in the print only mode. I can get the look of the Teresa Collin's Black and White Cartridge, with the Damask Decor cartridge, the Imagine and CCR while I wait for the cartridge to fit into the budget. I then stamped some snowflakes with Gelatin Fancy Flakes - Big set around the Damask Decor image.
I loved the rosette inspired poinsettia I made for one of my Christmas cards and had to make another to go into a scrapbook! This one has another vintage button center, a beautiful glass button in black and gold! The rosette and the red paisley motif are both cut from The Robin's Nest Red Paisley paper.
The grey snowflake border is Martha Stewart Skyward Snowflake punch. I used the same punch to make the round snowflake at the top of the embellishments, just punching two of the sides opposite each other.
The teal and grey snowflake is Cricut When it's Cold Outside cartridge, embellished with The Robin's Nest Cotton Candy Dew Drops. The silver doily is Wilton. The back flower, with white details is a Stampin Up Rubon embellished with some rain drop stickers from Cloud9 Designs. I love this little folk art look!
The black and white stripe paper is Basic Grey. The teal polka dot stripe is made with Coordinations paper and the Cuttlebug Swiss dot folder.

Friday, December 23, 2011

Great Lakes Great Finds Box


So much to share today: Another idea for those Advent calendars that did not get scrapped before Advent, and how to make fabulous titles with Word Art from Microsoft Word! Last year I purchased the Kaisercraft Advent Calendar and I finally finished it using beautiful papers from The Robin's Nest! This time instead of an Advent Calendar, I made a box for my boys rock collection! You might be able to pick some up an advent calendar on clearance the day after Christmas!
Every summer we visit Lake Michigan and the boys are always finding fossils and other rocks. If you make the Kaisercraft Advent Calendar I recommend you visit the Merly Impressions Blog HERE as the instructions on the Kaisercraft site were not helpful or detailed. I painted the box with acrylic paint and allowed it to dry. I used the assembly instructions found in the tutorial at the link above. For the drawer boxes you can find a list of all the beautiful Robin's Nest papers and embellishments at the bottom of this post.

Using The Robin's Nest Glitter Sea Shore paper I created the background for the inside square in the box. I trimmed off the glittered print at the bottom and trimmed the plain teal portion at the top, so that it measured 8 1/2" wide to fit through my printer. It is so trendy right now to have text and book like backgrounds on your pages. So, I found an image on the internet for free of the Great Lakes and printed it onto the top portion of the Glitter Sea Shorepaper. Be sure to make a test print on scrap paper first if you use this technique!
To make the title I used the Word Art in Microsoft Word. Here's how:
1) Open Microsoft Word and an empty document
2) Click on the Insert Tab at the Top of the screen.
3) Click on the Word Art Icon on the right hand sideChose the Word Art you want to use by clic
king on it. I wanted a word that was wider at the beginning and end of the word and narrow in the middle.

4) Chose the font you want and type your Text in the dialog box that appears and click OK


Above is how mine looked.
5) Drag to resize as desired


6) Print out this file if you have NO digital software that works with a cutter, for those of you with a cutter, skip to step 8
7) Temporarily adhere your printout to the paper you want to use in the center of the box and hand cut

8) If you have a cutter with digital software such as SCAL, Make the The Cutter or other, Hit the Print Screen button.
9) Open Paint software
10) Paste your screen print into the new paint document and save as a JPG image
11) Open your digitial cutter software and covert the JPG to the format used my your digital cutter. For SCAL2, this is click on the File menu and click Trace Image. Click Browse and select the photo you saved in step 10. Now you have your title! For the cursive font that says "Lakes" and "Finds" I used the Opposites Attract Cricut Cartridge and my Cricut DS software to weld the letters.
This box is great because you can place the bigger rocks on the shelf as pictured and limit your kids to smaller rocks to fit in the drawers. The Robin's Nest papers were perfect for a masculine box that even a Mom could love for her home decor!

Supplies Used
The Robin's Nest Glitter Sea Shore Paper (center of box)
The Robin's Nest Calamity Jane Stripe (Stripe mat for title & on drawers)
The Robin's Nest Glitter Witch Accessories Paper (Chocolate Brown ships wheel, drawers & title)
The Robin's Nest Veranda Love/Stripe Paper
Making Memories Ribbon
Vintage button
Microsoft Word Software
SCAL or other cutting software (optional)
Ribbon (not sure as it has been in the stash for sooo long)
Art Glitter (on Dragonfly)


Tuesday, December 20, 2011

Snow Angel Rosettes


I am almost finished with my advent calendars! I am working on December 24th and making rosettes. I printed out the sweater paper from the Snow Angel Imagine Cartridge and cut them into 2" strips. I then used the Tim Holtz rosette die to cut them and made the following rosettes. I think they are fabulous and you just might want to give them a try! I can't wait to try this with the red sweater print on Snow Angel too!

Thursday, December 15, 2011

Imagine Advent Calendar Days 6-10


So, I'm moving on to days 6-10 on my Imagine Advent Calendar. If your following along, I am continuing to use the Snow Angel Imagine cartridge and day 6 is made with Close to My Heart Art Philosophy. I enlarged the pattern and centered it in my heart box. Find the CCR files for all 5 days HERE.

Day 7 is just the stocking from Snow Angel! Quick and easy to print and cut!
Day 8 is a box from Tags, Bags, Boxes and More. I did make the sweater pattern bigger! This is actually much like the box we know from childhood for holding a deck of cards. I decided to leave the top open and will add the number to the white space. I stapled the round paper clip to the box, so that when the box is filled with goodies (such as chewing gum) it won't fall off the calendar!


Day9 I made snow angel and cut her inside the circle. This one is made in two steps as before. Print ONLY file first, leave it on the mat and then use the CUT ONLY file. The faux snow if from Art Glitter.
Day 10 is made with Close To My Heart Art Philosophy. I enlarged the pattern and centered it again to see the snow couple!

Tuesday, December 13, 2011

Congratulations to My Fellow Team Mates at The Robin's Nest


I am so excited to make the design team at The Robin's Nest for a second term! Congratulations to all of my team mates on design team for this term! The are: Terri Sproul, Carole Lassak, Becky Conley, Erika Taylor, Peg Rounds, Irit Shalom , Kristi Parker Van Doren, Amanda Marks, and Michelle Cummins.
I'd also like to wish the previous design team members a fond farewell and thank them for all the wonderful things they shared with me and taught me! I will miss you on The Chattering Robin's blog Gini Williams Cagle, Jan Holland Hennings, Tenny D. Kusuma and Kristin Keller!

Last Minute Christmas Crafting!


I have a confession to make: I am a last minute Christmas crafter! This year, I have set myself an ambitious goal: an Advent calendar for my sisters. I have six sisters and I am making one for a sister in law for a total of seven. Along with the goal of an advent calendar, I have set the following goals:
1) Spend no more than $5.00 on each Advent Calendar! This is a family rule we came up with long ago to keep Christmas affordable and it has become a challenge to see who can give the best gift for $5.00!
2) Make it using the Cricut Craft Room software. I really want to learn how to use it and I learn best by doing!
3) Make it with the Snow Angel cart and my existing Cricut cartridges (I'm not confessing how many I have).
4) Get the best use of my paper! When I worked in fashion design, I made markers for cutting clothing. These are the patterns for cutting the garment pieces from the fabric used by the digital cutters. The goal was to use 80% off the fabric. I think that it is a great idea to use the most of my 12 x 12 sheet! Now some of the items don't take a whole page, and some take more than one page. I am just making it a goal!
5) Create CCR files and share them for others to make the same or similar calendar.
6) Finish on time. So, I think I will need to make 5 days at a time.
7) Not run out of ink! So, I will be supplementing my Imagine images with some of my scraps and some internet free printouts!
8) Pack myself day kits to work on while I have down time. So, for each day I print and cut the items and packed them in freezer size baggies. I brought them with me to work on in the school pick up line and out to crops. I even had a girl friend offer to help me and because I had them packed with one sample made, we got through 35 items in an hour! Thanks so much Tina!
So, are you with me? Well maybe you don't have six sisters, but at this price, you can make one for yourself, the teachers, and your relatives! Maybe you can save these and use them next year!

Supply List
White canvas 16" x 20" (Michael's with a coupon) Price $3.80 each
Red Wire Price per calendar $0.95
Staple gun and staples
White 12 x 12 Cardstock
Cricut Imagine
Snow Angel Cartridge
Cricut Art Philosophy Cartridge
Cricut Doodlecharms Cartridge
Cricut Winter Woodland Cartridge
Cricut Martha Stewart Seasonal Cakes Cartridge
Pop Dots and your favorite glues

Prepare the Canvas

Begin the calendar by preparing the canvas. You can paint the canvas, or distress it with some distress ink. If you plan on using white items on your calendar as I did, you will want to have some color on the canvas before you start adding your wire. Divide the length of my canvas (20") into 4 sections and mark it with a pencil along both sides. Then drape the red wire across the top width of the canvas, and at every one of the marks, stapling them in place. Leave a bit of excess on the edges and curl around a pencil to make it cute!


Calendar Row One: Day's 1-5
For my calendar, I planned the following for each line: One bible verse, one pocket and or box, one blue item, one green item, one red item, one brown item, and one Christmas themed shape or die from a cartridge. A decided to make most of my numbers up at the end of the project in case I want to move an item or two. However, I did decide to make up day one and Christmas day first and then work from there. So, my file for day one will have a number in it. 
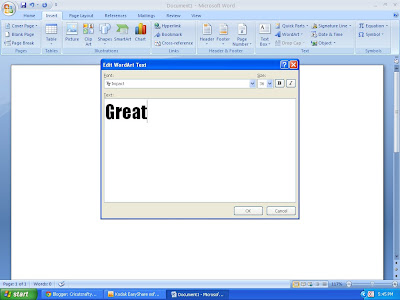
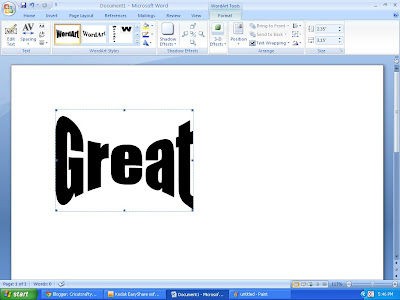
FIND ALL OF THE CCR FILES AT THIS POST ON THE CRICUT MESSAGE BOARD.
Day one is made with Martha Stewart Seasonal Cake cart, but if you don't have this just do a search of the CCR for a postage stamp! I think there are over 8 cartridges with postage stamps you can use! I also used Snow Angel for the pattern and used the CCR to make the pattern bigger. I can't tell you how exciting this feature is to my CAD minded brain! I used Microsoft Word to make the verse bubble. Just insert a round text box and type your verse choice! I changed the color to the green default in Microsoft word and printed it on and HP printer. I think the color matches well! I then punched the circle using my Creative Memories circle punch 1 1/4". The scalloped circle is from Art Philosophy and is cut at 1 1/2". Use pop dots for the # one layer. Punch a hole in the top of the stamp tag portion to hang on the calendar. Here is the CCR file for you to use. Day one requires one piece of card stock.

Christmas Tree Day two: Just use some of your printed carstock at home that coordinates with Snow Angel and cut the tree with Art Philosopy. After I cut the tree I mated it on white cardstock and hand cut, but you can add your own layer to the CCR file.
Snowglobe Day 3: Alright, confession here...you will have to create this snow globe in several steps. For some reason, Imagine images on my machine have a color border that the machine cuts around when I try and WELD an Imagine image to a standard cartridge image. It is not the same color as the image, and so stands out. Since I wanted my girl in the snowglobe to not have this border, I took the time to print only! Then created a cut only globe file cut file. Now, there should be a method to make this all one file, but despite watching the video three times I can't get the layers to work correctly to make this one file. And I'm under a deadline here people, so be gracious! You will need Snow Angel and Doodlecharms.
Pocket Skate Box Day 4: Just a brown box cut with solid card stock and Tags, Bags, Boxes and More. Here is the CCR file for the box. Get your reading glasses out to score this one ladies as the smaller box has smaller score lines! I love that this has slots of ribbon as I have a ribbon habit. Now, the skates here are stickers, but I have to keep this on budget, so I will cut the rest with Winter Woodland.
Warm Woolen Mittens Day 5: You will just need Snow Angel for this project. And here is my switch up for you and new feature to try on CCR: change your pattern! If you look at the cart the mittens are green, but I wanted blue to balance my colors. So I swapped it out! LOVE, LOVE, LOVE this CCR feature! I also used the separate layers feature so I could add a little embellishment under my mitten cuff. Attach your choice of trip and pop dot the cuff to acomodate the bulk of the trim. I used some rubons and bling from the stash to ad a detail too!

Friday, December 9, 2011

Souvenir Keepsake with The Robin's Nest


I love to make gifts for the people I love! This year, I worked made a souvenir box/mini album purse using The Robin's Nest products. The purse is made with a vintage wooden handbag I picked up at a garage sale over the summer.


Above you can see before pictures of the purse, inside and outside. To make the purse into a mini album/souvenir box, I notched a doll rod with a saw and added round binder clips. I then nailed it to the inside of the purse. I created three pages one for each country visited using Italy Stickers,
Germany Stickers, and France Stickers. For the papers I used Ocean colored Fleur (on Germany page), on the Italy page, and for the France page.

On both sides of the purse, I lined the insides with Calamity Jane Stripe. I cut my lining a bit off on the left side, but added a bit of the paper, some ribbon and some Lullaby Tear Drops to make a faux beaded trim. I then sandwhiched a bit of organza between the side of the purse and the paper on one side. On the other side, I lined the purse with more paper, and added some adhesive hook and loop tape. To the organza I sewed some more of the paper and the other side of the hook and loop tape. The idea is for this side to hold some souvenirs such as ticket stubs, Eurail passes, loose foreign change, etc.

On the outide of the purse, I used the Ocean Fleurs striped side and pleated it to look like ribbon. I sewed it on to some ribbon that I think is by Anna Griffin and hot glued the ribbon onto the sides of the purse. I created a label using Glitter Gold Journaling, and Glitter Gold Letters. I hand cut around the journaling block and matted it on more of the brown paper.
I cut some flowers using the Ocean Fleur, and love paper using My Favorite Things Mini Rolled Rose and Rolled Rose dies, the leaves are just fussy cut from the brown paper. The tag I made with the Robin's Nest Veranda Love Stripe paper, and my Microsoft word on my computer, was used to print "Europe." I love that I can change my ink color to match my project!

Yes, I Do Do Windows!


Just had to try another window project with the Heartfelt Creations die! These are the only windows I do, but I do do windows! The stripe paper is Pink Paisley, the pillow box is Cricut Easter 2010, with the bunny hidden. The flowers are sequins from Michaels and the branch is made with an EK Sucess punch. Snow is SU, glue is Art Glitter Dries Clear Adhesive. I scavenged the wreath off of some Christmas wrapping from last year! I made this as part of the design team try out for Pink Paisley!

Tuesday, December 6, 2011

Celebrating Hobbies & A Birthday with Moxie


When I saw the Basic Grey Weekly Challenge (back on Nov 18) to use punches, I knew what I wanted to do for my sister's birthday card! She is to quilting what I am to scrap booking: obsessed! I knew that this card would be perfect for the Moxie Fab World Celebrating Hobbies Challenge! We have both been in love with the Cathedral Window block since childhood and both the Basic Grey page and my card was inspired by a quilt block called Cathedral Window. But, I wanted to challenge my self to use the Cricut Craft Room software to make this card and NOT use punches!
So, to get this look:
1) Open and Create a new CCR file
2) Plug the Accent Essentials Cricut Cartridge on one side of the Imagine and the Audrey Imagine Cartridge on the other.
3) Create a circle using this image from Accent Essentials


4) Use the Hide Select Contour to hide the middle scallop shape
5) Copy the circle and paste two times. You will notice that the copies appear in the same line just below the orignal!
6) Now select the three circles and copy and paste two times. And YES, they line up just to the right to form the grid of 3 by 3!
7) Select and Copy all 9 circles
8) Paste them and move them to the right of the orignal 9. I adjusted these to fit an A2 card size.
9) Fill all the original 9 circles on the left with assorted black patterns from Audrey
10) Fill all the copied 9 circles on the right with assorted color patterns from Audrey
11) Save and PRINT ONLY these images!
12) Allow the Paper to dry completely and flip this over on the mat!
13) Edit the original circles using the Hide select contour to show the middle scallop and HIDE the outside circle.
14) Set the color to white on all the remaining scallop shapes
15) Save your file
16) Leaving your original paper that you printed before ON the mat, send the white scallop shapes in the PRINT & CUT mode to the Imagine. Since the Imagine assumes your paper is white it will only cut the center shape from the original black circles.
Now trim the paper to the A2 card size and you will have two of these cards! I added a bit of ribbon from Michaels and an SU buckle. I stamped the sentiment with CTMH celebrations set that matches Art Philosophy!

Monday, December 5, 2011

Winner of Here We Come a Caroling is...


I used Random.org and picked a winner from the sweet comments you all left, and the winner of the Here We Come a Caroling Blog hop prize is: Kristan!
Kristan's comment was: very pretty!! thanks for the tip with the printer!
Kristan Getting Cricky Jr. DTM
Kristan, I will send you an email, but sometimes my prize winner's email filters block emails with prizes in the title. If you have any problems receiving your notice just email be using the contact button on this blog!
I am always afraid to be the first commenter on blogs with contests, but as you can see it can happen! Random.org really picks a random winner!

Clare's Entry for Case Study Challenge # 68


I saw the current challenge at Case Study and loved the colors! I knew that I wanted to get out The Robin's Nest Ocean Fleur and make up a little thank you card for Nancy H. over at Just About the Details for the Cricut Cartridge I won from her blog. I tried black with the teal and orange combo and thought it too dark, but I often used a dark chocolate brown instead of black. So, here I used The Robin's Nest Witch Accessories paper. I won Lovely Floral and had to use it in her than you card! I cut the circle in The Robin's Nest Distressed Honeycomb paper and inked the edges. I then welded the Thank You and the flourished circle together with my Gypsy. I hand stitched a detail around the circle to add a bit of white and then punched the butterflies with a Creative Memories punch. I added a few dots to my cut with the white Signo pen.

LinkWithin

Related Posts with Thumbnails