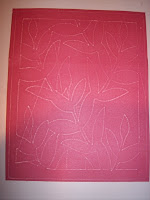
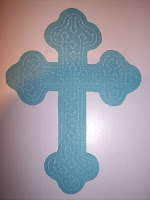
background

Wednesday, March 31, 2010

Scalloped Scallops! Straight from the Nest!


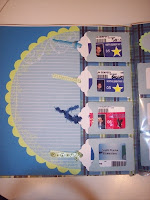
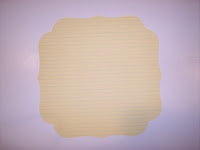
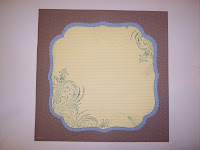
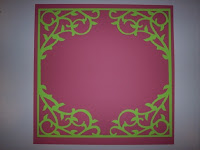
Just got my Straight from the Nest Cartridge from HSN. Don't worry, I used a coupon. Even so, it was a bit of a splurge, but I feel well worth it. Did you see the scalloped scallop edge motif? I always miss something when previewing in my DS and or Gypsy. So, when I get the cartridge, I like to browse the book carefully. Here is what I made with the scalloped scallop motif. I think you scrapbookers might enjoy this one. Perhaps I should have named my blog Scalloped Obsessed! Almost forgot, you will need George, Basic Shapes and Straight from the Nest. HERE is the file.

Monday, March 29, 2010

Dry Embossing with Your Cricut & Gel Pens


I don't know if anyone one else has thought of this, but I had this idea yesterday to try and dry emboss with my Cricut. Here's how I did it:
Supplies:
1) Cardstock with a different color core. I used Close To My Heart (Pink and white) in one example and Coordinations in another (Blue Cross).
2) Your Cricut Machine.
3) A foam matt from a Close to My Heart Stamp Set. These come with every CTMH set and help you get an even image when stamping with clear acrylic stamps. I also tried some packaging foam around the house and it was too thick.
4) A gel pen holder and gel pen. I used Amy Chomas'.
5) A fresh matt to help hold your CTMH foam in place
6) Double stick tape or painters tape to hold your cardstock on top of the foam. You could even use the hinge method, and tape it to the matt on one side.
7) A fine grit sanding block or paper.
Machine Settings
1) Speed should be slow, I used a three
2) Pressure is lowest setting on the dial. I used a one for CTMH cardstock and a 2 for Coordinations cardstock. There is no pressure adjustment for the gel pen holder.
Instructions:
1) Cut your cardstock as desired. I wanted to make an Easter Card and cut it a little bigger to trim down after the embossing (6 x 6).
2) Place the CTMH foam on your Cricut matt, smoothing it down to stick well while drawing with the pens.
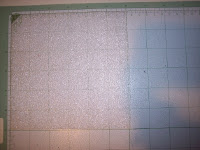
3) Place double stick tape on the cardstock on the right side of the paper, and place this on top of the foam in step 2. Again, smoothing it down. I used the wrong side so that you do not see the colored pen on the final image, but if you have a pen that no longer works, you could use it too!
4) Remove your cutting blade from your Cricut.
5) BEFRORE PUTTING YOUR GEL PEN HOLDER IN THE MACHINE, Load the paper.
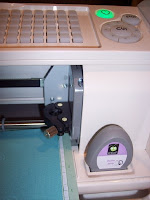
6) Still before putting in your gel pen and holder, move your blade using the arrows next to the cut button so that your blade is about 1/2" inside the cardstock edge in both the X and Y direction. This will keep the paper from tearing as the gel pen moves to start the "cut". If you are using DS make sure your image is not outside this 1/2" edge. If you are NOT using DS, use the Set Paper Size button before hitting cut.
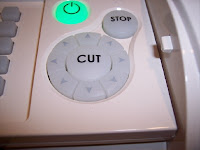
7) Put in the gel pen and gel pen holder, be sure to tighten the blade housing clamp.
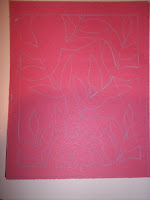
8) Check that your settings are ok for speed and pressure and hit cut. Here is a picture of the drawn image. Notice the pen color is blue (click to see bigger) and that is why I put the right side of the paper down.
9) Remove the gel pen and housing
10) Unload the paper, remove tape and sand to reveal your embossing.
For some reason blogspot.com is not letting me add pictures. Find the pictures on the Cricut Message Board Here. And feel free to email me questions (find my email address in my blog profile.

Saturday, March 27, 2010

Journaling Marquee for the DS Users


Ok, HERE is a version for the DS users. You will need Storybook and George. Also, have fun playing with this idea. You will see when you open the file, there is a page for adding swirls with your pens. I used the gel pens and swirls from Storybook as well as stamps from Ink-a-dink-a-do. These stamps are called Dot Flourishes. I soooo love Inkadinkado! After I cut my Marquee and the scalloped background, I stamped again, then cut it down the middle length wise. I feel the need to have two page spreads with coordinating paper. Is it just me, or do other people feel this compulsion?!

Using Gel Pens for a journaling block


Just this last week I had an idea inspired by a purchased paper (see picture above) for my gel pens and holder for from Amy Chomas. I believe my store bought item was by Bo Bunny (it's glued down). And may I just say, this solves a design problem I have been mulling over for at least a year. I scapbook and want to be better about recording memories on paper. I like my writing and want to use it, but have always wanted to have straight lines that fit journaling blocks. Now, I figured out I can use my gel pens and make any shape and size journaling block with perfect lines! Here is what I did using SCAL2:
1) Created a straight line wider than my journaling block. I wanted my lines to go to the edge of the shape.
2) Copied the lines and pasted repeatedly, so that they were past the top and bottom of my journaling shape.
3) Used the align tool to center them.
4) Grouped them and moved them to assure they fit the top note shape.
5) Swapped my blade for the mini gel pen holder from Amy Chomas and hit cut.
6) Loaded paper a second time and swapped the gel pin holder out (back to the blade). Be sure to check your pressure if you want nice even lines. I actually like to do a test cut, as I am just getting used to these.
7) Cut the top note shape (this portion was originally created my Carla at Scrappedlives) Here is how the lined paper looks cut. To see the lines better, just click on the image.
8) Cut a scalloped top note to go behind the top note.
9) Stamped the edges with Fancy Pants Pollen Dust. Here are my pieces stamped and assembled, awaiting my journaling.

Like this file? Find it HERE in the SCAL2 format only. My Inkscape skills are limited and I do not know how to create this in a svg format. Sorry! I will try and work up a versio for my DS friends in my next post.

Tuesday, March 23, 2010

Spring is Here! Inspired by fabric again.


Just finished up this cover for a custom order. So Spring like! I love the details in this fabric and have some cut file ideas. Would like to pull out those gel pens again after seeing the white lines on the scallops. Isn't the embelly fun?! Now if I can just find the energy and the time!

Sunday, March 21, 2010

Gypsy Charging Station Idea


Every time I get a Currents catalog, I am intrigued by the cell phone docking station. My sense of organization, loves the idea of a place for everything and everything in it's place (then I can't lose it!). So, why not make a docking station for my Gypsy?

I used a paper holder (not sure what it is really called) that I bought years ago, while writing my masters thesis. Here is the side view.
I drilled a hole in it where I wanted to poke my Gypsy cord thru and began to embellish my docking station. I wanted it to match my MP3 speakers which I had already embellished. So, I covered the grey base with black Quickutz vinyl, adhered matching blue paper, stamped white paper with Ink-a-dink-a-doo Bold Damask stamps. I got these on clearance at Michaels. I used the CTMH Dutch blue ink.
To hold the Gypsy, I cut a clam shell from my latest Cricut Cartridge. I love the idea of recycling, and that it is clear so you can see the pretty stamping. Also, I did not have to worry about my Gypsy tipping over while charging. I used my scissors to cut it apart carefully, and then my paper trimmer and exacto knife. I cut just below the lip of the clam shell as straight as I could. I then sanded the edges with a fine grit sandpaper, so it would not be to sharp. I used the Provo Craft Traffically Tacky tape to adhere this to my docking station.

Side view of the clam shell glued down below.


Above, you can see how my charging cord come's through. To store more of my Gypsy cords, I reused another clear packaging item, from Kurio that once held some glittered letters. Adhereding it using the PC tape. Here is a picture of my MP3 player and speakers that match my Gypsy Charging Station.
I have always loved blue and wanted a blue and white craft room. I am happy that the blue matches the blue display screen on my MP3 and the power light on my Gypsy. I have also added green to my craft room color scheme to express my passion for my Cricut!

Saturday, March 20, 2010

Another Fancy Frame from Heritage


HERE is another design I made with Heritage. I love the beautiful scrolls PC has provided in their cartridges! Wouldn't this be perfect for an Easter page?

Friday, March 19, 2010

Happy with Heritage cut file to share


Well, I just got Heritage in the mail today. And there are lots of things going through my head after seeing the booklet. So, I will share one today, and be sure to check back later for more. You only need Heritage for this cut file. Find the file HERE.

Wednesday, March 17, 2010

I won my first blog award! Thanks dtsarts!


So what I have to do is......

1) Link back to the person (Dardi at dtsartblog.blogspot.com) who sent me the award. Thanks so much Dardi!

2) Post where I would like to be in 10 years

3) Give this award to 10 awesome bloggers.

Where would I like to be in ten years? Well, as long as I am going to dream, I am going to give you my dream job in 10 years! I hope to work in the scrapbooking industry in a computer aided design job, more specifically, I would like to design cut images to be used on machines such as the Cricut. Before I stayed home with my children, I had a computer aided design job in the apparel product development industry. I worked for Sears as the System Support manager for their apparel product development department. We made flat sketches of all their apparel, to be sent overseas for pricing by manufacturers all over the world. We used a CAD system based in AutoCAD and a basic spreadsheet for calculating the measurements of the garments based on sizes. I developed the sketch and measurement databases, acted as a go between for the users and the software developers, trained over 50 employees and managed the software help desk. I love to create on the computer and scrap booking is my passion. So, my dream is to have a job in the industry in 10 years. In fact PC if you see this post, I do freelance work and can start now!

Now on to my ten award receipients. Oh, this is hard! There are so many bloggers, it is hard to choose just 10, so hopefully, I will have a chance to do this again.
1) Christine Middlecamp-She is the queen of layering and such a trend setter. I don't think she ever has a bad creating day. Everything she makes is beautiful and I love her sense of color!
2) Melissa Johnson-She is a Close to Me Heart Consultant and the queen of tips! When I want to know how to do something, she knows all the best methods! And a beautiful artist too! I am so glad to live so close to such talent!
3) Gerry Van Gent-She is a uber talented scrapbooker, who I just met on FB and has just begun to blog. I want to encourage her to keep sharing her beautiful work. It is so post worthy!
4) Carolyn at Cutting Time I love her work and her tutorials! I generous crafter who lives across the globe from me. She has been a Inkscape find for me!
5) Diane at Capadia I so admire Diane! She see things in the cartridges, and knows the software so well. She is the cornerstone to my DS knowledge.
6) Heather at the Finicky Frog. What beautiful things she makes! I love her sense of style and she has one of the few blogs I visit that is not scrapbook related!
7) Sara Fink at Crop Out Diabetes. Sara uses her love and knowledge of crafting for a great causes-Juvenile Diabetes Reseach! This is something I try and do, help others in some manner while I scrapbook with fundraisers, or food drives, etc.
8) Paulo at SCALe-files What to say about Paulo, other than if you cut svg files, you must visit and subscribe to this blog! What glam! I shall quickly run out of room for his files alone!
9) Amyee at A Southernbelle's has beautiful svg items I love to check out!
10) Monica at Monica's Creative Room. What can I say about Monica's files?! Beautiful, professional, available in so many formats, generously shared!

Sunday, March 14, 2010

Straight From the Nest Lace Paper


Here is another cut file, made with Straight from the Nest and Plantin Schoolbook. It is very much like the Mothers day lace paper. Not sure about how available this cartridge is...I did not find it at online stores, but ebay had it. Guess it will go on my wish list! Please leave your comments and encourage me to keep sharing. Thanks!
Find the DS file HERE.

Saturday, March 13, 2010

Have to Have Hertitage! Cut file to share.


Playing with DS again today, and took a look at the Heritage cartridge. I have to have this one. Can't wait for when the budget allows this one! In the meantime, I thought this file worthy of sharing. Would love for someone to share what they make with it, since I will have to wait for the tax return check. As always your comments are appreciated!
To use this file you will need George, Basic Shapes and Heritage. Please find the corrected the file HERE in the DS format.

Wednesday, March 10, 2010

Amy Chomas Mini Marker holders My 1st Projects


I just finished my first projects with my mini gel marker holder from Amy Chomas. Amy and her husband have a business making marker holders that you can use in place of your blade. I won these Staples Mini markers and the holder in the Crop Out Diabetes online crop, and promised to post some pictures when I used them. Find Amy and her pen holders here. She carries several different marker holders, so check it out. Thanks Amy for the holder, markers and for donating to Crop Out Diabetes!
Here I have made a birthday card for my brother. Can you guess his birthdate? Yes, St. Patrick's Day! Since I have 4 brothers and six sisters, I am thankful this one falls on a holiday and I never forget it!
I used Graphically Speaking for the scalloped frame, Lyrical Letters for the Happy Bday and A Childs Year for the clover. If you want this cut file, just leave a post with your email addy. I wasn't sure how many people need St. Patrick's Day birthday cards, and you will need to get it out quickly if you use it. I am showing a picture with just the markers, and one I painted with my watercolor markers. Haven't had those out to paint since college when I minored in Art.

Then I decided to try a very detailed cut that I thought might be difficult to cut, weed and or get off the mat. Also, I wanted to try and SVG file. I loved Paulo's Indian lace border! You can find Paulo's blog here. Be warned you will want all his files! I used his top file for the detail and his bottom file for the cutting of the lace after I used my marker.
Here's what I learned. 1) Do a test cut (actually a print) to make sure your marker is inserted all the way. 2) My machine had a bit of trouble with the edge of the mat, even with the marker inserted all the way. So, I will move my images in a half an inch from the cutting edge for future marker projects. If the problem was the marker, or the holder the lines made by the movement of the blade housing would have been all over my file. So, I believe this is my machine's issue! 3) I love that I have a new tool to use on my machine!

Thank you card with yesterday's cut file


Ok, here is my thank you card made with yesterday's cut file. And you may notice the holes along the edge, they are not in the cut file. I wanted to fill the space between my stamp and my cut file edge and let the red card stock show through. So, I got out my Making Memories anywhere punch with three sizes and hammered away. Sometimes, it is great to hit something when your creating. The colors seem somber for me and I think I would love to use this again in a sympathy card. I used the Close to My Heart True Friends stamp and For Every Occasion sets. Flowers are Prima and I added a bit of bling.

Tuesday, March 9, 2010

Glamourous Frame NOT just for Christmas!


After discovering the fancy frame in Graphically Speaking, I knew I had to take a look at all the frames in my Cricut Cartridges. The search function in the Gypsy is far superior to the one if DS, so I got out the Gypsy while watching TV last night and here is one I made. I used Christmas Noel again, and let me tell you it is worth of purchase even though PC is retiring it. Get it now before the limited quantities are gone and the price goes up! HERE is the file. The file format is Gypsy, but DS users can use it too! Just choose the file type as Gypsy when you open it in DS.
As usual I am posting the picture before I cut it. I am off to work on two customer orders and don't feel you should have to wait to cut my files:). Also, I had a realization this morning when I went to post my picture. My eyesight is bad! This was made with the reading glasses on! I needed to do some editing in DS because what I thought was aligned on my Gypsy wasn't! I will be proofing all of my Gypsy files in DS from now on! Good thing I haven't posted a lot of Gypsy files here!

Monday, March 8, 2010

Folk Art Charm! I had to share what I did with yesterdays cut file!


I had to share the page I made with yesterday's cut file! When I first designed it, I thought it glamorous. Then, when I finished it today I thought, folk art charm. I used Me and My Big Ideas blue patterned paper int he background, and their stickers and bling on the page. I cut the title with SCAL because I don't have Songbird yet (I just talked myself into another cartridge).

I used my uniball pen to faux stitch the edge and highlighted the location in the bottom corner with the heart shaped bling from Oriental trading. Pleased as punch with this page!

Sunday, March 7, 2010

Fancy Edge Marquee Cut File to Share: For the Glam Girls!


Yesterday at the crop, I stumbled upon the fancy marquee frame in Graphically Speaking. How have I missed this? And of course, I knew I had to use it! So, up early this morning, I am designing with the fancy marquee and the plain marquee in Storybook. I can't cut this right now, because my Expression is at the crop (going back today). But here is the screen capture. If you download, please leave me a comment. Please feel free to share the link to my blog and not the file with others. Thanks! Find the cut file HERE. I have had a request for a Gypsy version. Here is the Gypsy version.

Saturday, March 6, 2010

My Shops at a Crop! Scrapalicious in Dekalb, IL.


Every year my S.C.R.A.P. Guild of Northern IL friends hold a fundraiser crop. This year I will be a vendor. If you are looking for my shop on the blog, it will reopen on Monday, March 8, 2010.
This crop is great! The space for croppers is so generous! They have had door prizes in the past for every cropper (not sure if this will be the case this year with the economy). They provide lunch and dinner in the crop fee. There is shopping with Close to My Heart, Stampin' Up, The Angel Company, Victoria's Scrappin Bin (Cricut Vendor), Creative Memories and Scrapin Covers (that's me).
Proceeds go to the S.C.R.A.P. Guild of Northern IL, with a portion going to local food banks. Hence the name Scrapalicious. You can find out more about the S.C.R.A.P. Guild at their website here.

Thursday, March 4, 2010

Gerry's Blog! You gotta check this out!


You may remember my post about the inside scallop inspired by a facebook friend. Well, she has just started her own blog! I am so excited and inspired by Gerry's work that I am posting the link here. This is a picture of some pages she is designing for My Creative Scrapbook. I love the detail in her pages! That layered look that somehow looks old and timeless at the same time. Perhaps it is the European influence. Thanks Gerry for inspiring me! I have already subscribed to posts!

LinkWithin

Related Posts with Thumbnails