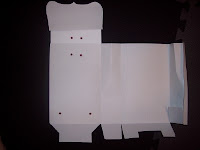
Cutting the bag1) Cut the backpack base and pocket flap (this will be with the largest paper) with the right side of the paper towards the stick side of the matt. DO NOT unload your matt and swap out your blade for a cricut marker.
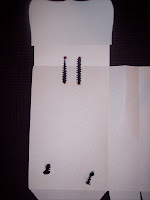
2) Leave your backpack base piece in place on the matt, and your paper loaded in the machine. Open the eyelet marking svg and scale it if necessary to fit the larger bag size. Then "cut" with the marker.
3) Swap back to the standard blade and cut the pocket and bag flap pieces
4) Cut the contrast flap pieces

Preparing Bag for assembly1) Score back pack base with lines perpendicular to the straight top edge and running through the lowest valleys of the bottom of the bag (uneven side)
2) Score the back pack with lines from one side of the back pack to the other, running in a straight line through all of the lowest portion of the valley on the bottom of the bag piece.
3) Score the back pack top piece where the marquee shape ends from edge to edge
4) Score the back pack top piece 1 1/4" from where the marquee shape ends for the bigger bag and 1" for the smaller bag
5) Glue the scored back pack flap to the back of the back pack base lining up the scored line closest to the straight edge with the top back of the bag.
6) Use your anywhere punch to punch holes as marked with the Cricut markers above. You should be punching 4 holes.
7) Hand mark dots in the middle of the folded top of the back pack flap parallel to the dots marked with the Cricut
8) Use your anywhere punch to punch these hand marked dots
9) Set eyelets in the six holes just created.
10) Fold your back pack at the sides, matching the front and back pieces with right sides together and excess towards center of the bag. Crease along center about 3 inches down, but NOT all the way to the bottom (see photo above).

Adding Ribbon
1) Tie a double knot at the end of the ribbon.
2) Starting at the bottom eyelet on the inside of the bag, thread ribbon through the eyelet to the outside of the bag. Pull ribbon through until stopped by the knot.
2) Thread the ribbon through the top back pack hole from outside to inside
3) Thread the ribbon through the flap eyelet just above the eyelet just threaded, from inside to outside
4) Thread the ribbon through the flap eyelet next to the eyelet in the flap just threaded
5) Follow the eyelets down the opposite side of the backpack as on the first side and finish the ribbon with a double knot on the inside.
6) Adjust ribbon evenly and glue dot on the inside between the top eyelets and back pack top eyelets, so hanging loop does not slip.
Use terrifically tacky tape to glue together the bag. Start with the sides, then the bottom side flaps, gluing the center bottom portion last. Oh, this was wordy! Hope you find this as simple and as cute as I did!

No comments:
Post a Comment