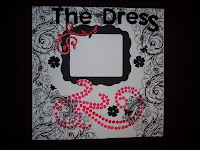
Ever since I received my Robin's Nest Dew Drops I have been wanting to try the rhinestone tool on my SCAL2 with the Dew Drops! So, this week I got out my Dew Drops and more items from the Robin's Nest to make a beautiful page for my niece's up coming wedding.
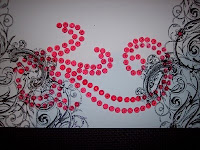
Most digital cutter software programs have a rhinestone tool. SCAL2 & 3, Pazzles software, Make the Cut and more. I can tell you that the Cricut DS and the Cricut Gypsy do NOT have a rhinestone tool. So, look for some options at the bottom of this post for those of you who don't have a cutter with the rhinestone feature!
I opened my SCAL2 and using the swirl shape library, chose a swirl I liked and sized it the way I wanted. I then selected the rhinestone option, under the Object menu. Once inside the Rhinestone dialog box, I selected the shape of the rhinestone as round and set my rhinestone size SMALLER than The Robin's Nest Dew Drops I was using. 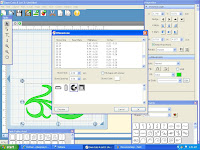
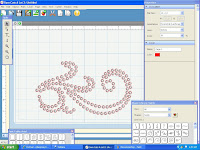


I then loaded my Cricut with the pen tool and a red pen to match the color of the Dew Drops. I then loaded The Robin's Nest patterned paper onto my mat, and hit the cut. Below you can see a picture of the circles drawn on the paper.
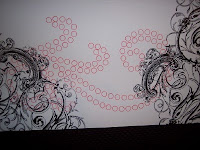
You can also cut holes in a scrap piece of paper BIGGER than the Dew Drops and used this as a template. I just prefer the pen method for gluing!
Once I had my circles drawn, I used my Quickutz tool to lift The Robin's Nest Dew Dew Glue off of the sheet and adhere them to the center of the drawn circle. Don't have that tool? You can use an awl, or the Creative Memories tool. Don't try and pick up the Dew Dew glue with your fingers as they will loose their stickiness! I then added The Robin's Nest Dew Drops in Red. 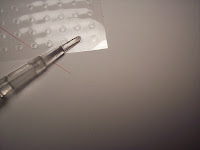

The black frame and red glitter swirls are both cut from the Cindy Loo Cricut Cartridge (see photo below). I cut The Robin's Nest Red Glittered Chipboard with my Cricut, using the Deep cut housing blade and a multi cut of 2 for the swirl. Love how wonderful this cuts! See below for a complete list of supplies.
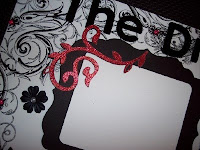
For those of you who do not have a cutter and software for placing rhinestones on a swirl use this method: Place a chipboard swirl on top of your page where you want your dew drops. Lightly trace the swirl with a colored pencil to match the color of the dew drops you choose. Using a flexible tape measure, mark off along the swirl where you want the center of your dew drops to be in an even increments. Now erase the line between the marks for the center of your dew drops, then glue. Try starting the dew drop placement at the tip of the swirl and working back to the base for a more natural look!
And for those of you who have a Cricut Gypsy or Cricut DS software, please see this post for how to get even placements.
Supply List
The Robin's Nest Dew Dew Glue
The Robin's Nest Rebellious Red Glitter Chipboard
The Robin's Nest Fairy Dust Dew Drops (center of black flowers)
Anna Griffin Peyton Collection Chipboard Letters
The Robin's Nest
Bazzill Flowers
Black Cardstock
Cricut Cindy Loo Cartridge

Just a quick note to let you know that a link to this post will be placed on CraftCrave in the Cutting category today [28 Aug 01:00am GMT]. Thanks, Maria
ReplyDelete