While online shopping a came across a pair of clearance gold jeans on Modcloth. A bit too bright for me, but well priced. It go me thinking...how could I get a solid jean to look like Sarah's printed jeans?
Whenever I want a professional looking project, I use tools that yield professional results. So, I knew I could use my Cricut! They recent has a blog post for altering dresses that also inspired me to use the Cricut for this project. So, how to create the pattern on the jeans with the Cricut? I had to rule out the iron on, because it would melt the fabric! So, I chose to use Sharpie markers.
Office Max has them for $0.25 each if you buy them individually. They won't wash off either.
So, you can see the before and after, I have posted my pants half finished. Here is how I got the look:
Supplies
Gold Coated Pair of Jeans
Cricut or other digital cutter
Paper Lace Cartridge
Card stock 12 x 12
Stencil tape
Sharpie markers (silver 8, bronze 2 and brown 2)
Tailors chalk
Long ruler
Instructions
1) Determine a lace pattern to use and cut in in the card stock to fit the page.
2) Determine your pattern repeat, and mark your template with a center line, a top & bottom.
3) Determine the grain line on your jean and mark it down the center of your jean leg with the tailors chalk. To do this, fold your jean leg in half matching the side seam to the inseam at the hem, and where the front and back rise meet. (See photo below)
4) Place a scrap piece of cardboard inside your jean waistband to prevent the back pockets from distorting your tracing.
5) Place your card stock template on the jean front, starting at the top, and matching the center line of the template to the chalk grain line of your jean, tape in place with the template tape.
6) Begin tracing your lace with one color marker. I used the silver sharpie.
7) Move pattern down the pant leg, keeping pattern aligned to the center with grain line and marked with chalk, continue tapping and tracing to finish the leg. Below is a close up of the pattern traced from my template in the silver marker.
8) When leg is finished begin doodling with the remaining two colors to fill in the pattern. I worked in small sections at a time. Drawing one leaf or swirl inside my Cricut motif, and moving down the leg to repeat the doodle when the Cricut pattern repeated.
9) Flip the template over, mark the top, bottom and center line again.
10) Repeat steps 3-8 again to finish the front of the other leg.
11) Flip jeans and trace and doodle the back pant legs in the same manner as the front legs. Use the scrap cardboard, inserted in the waistband again, to prevent front pockets from distorting the back tracing.
Here are before and after shots so far.
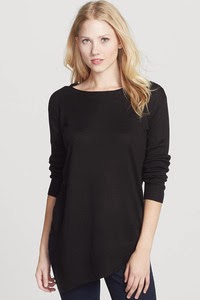
Since I am a pear figure, I will style this with an oversize asymmetrical sweater. I cannot wear cream or white well with my coloring, so I've ordered black. You can find this fabulous sweater ON SALE here.


No comments:
Post a Comment