background

Showing posts with label Christmas. Show all posts

Sunday, October 30, 2016

UFO Challenge #44: Anything Goes


It turns out that the only traditional 44th anniversary gift I could find information on is groceries.  Groceries?!  No, I think not!  So, this weeks challenge is anything goes.  To enter the challenge, just pull out a UFO you are working on write a blog post, on your travel themed UFO, then post a link to your blog post below, or photo online. 
I planned a page for more Christmas cards I need to scrapbook.  I just have to find the time to cut and glue.  I used Anna Griffin's Lovely Layered  Cards 2 and hid some of the contours and deleted some layers to focus on the wreath in the white layer.  I am dreaming of a white Christmas.  The Merry Christmas is from Anna's Christmas Kitsch.  

Saturday, April 2, 2016

Cricut Explore Has Me Scrap Booking Again

Now that I have a Cricut Explore, I am enjoying scrap booking again.  I love using the print and cut feature to make my own titles, like this Jingle Bell title made with my Imagine cartridges and Holly and Ivy cartridge.  The photo is not out of focus, I have blurred the face on purpose as it is not my child to share.  The circular font is made with the Cameo, as I don't know how to do this with the Explore.  Paper is by My Minds Eye (red polka dot back ground), American Crafts (candy cane stripe), K & Company (green papers). 
I always use my families photo Christmas cards to make pages for our Christmas album.  It's a wonderful way to see how each child grows and it's another way to decorate for the holiday's that tells my family how important they are when they visit.  We can look through the scrapbooks and ooh and aah over how they've grown.  I have also been known to display these pages in my Creative Memories framed box.

Friday, January 11, 2013

All That Glitters

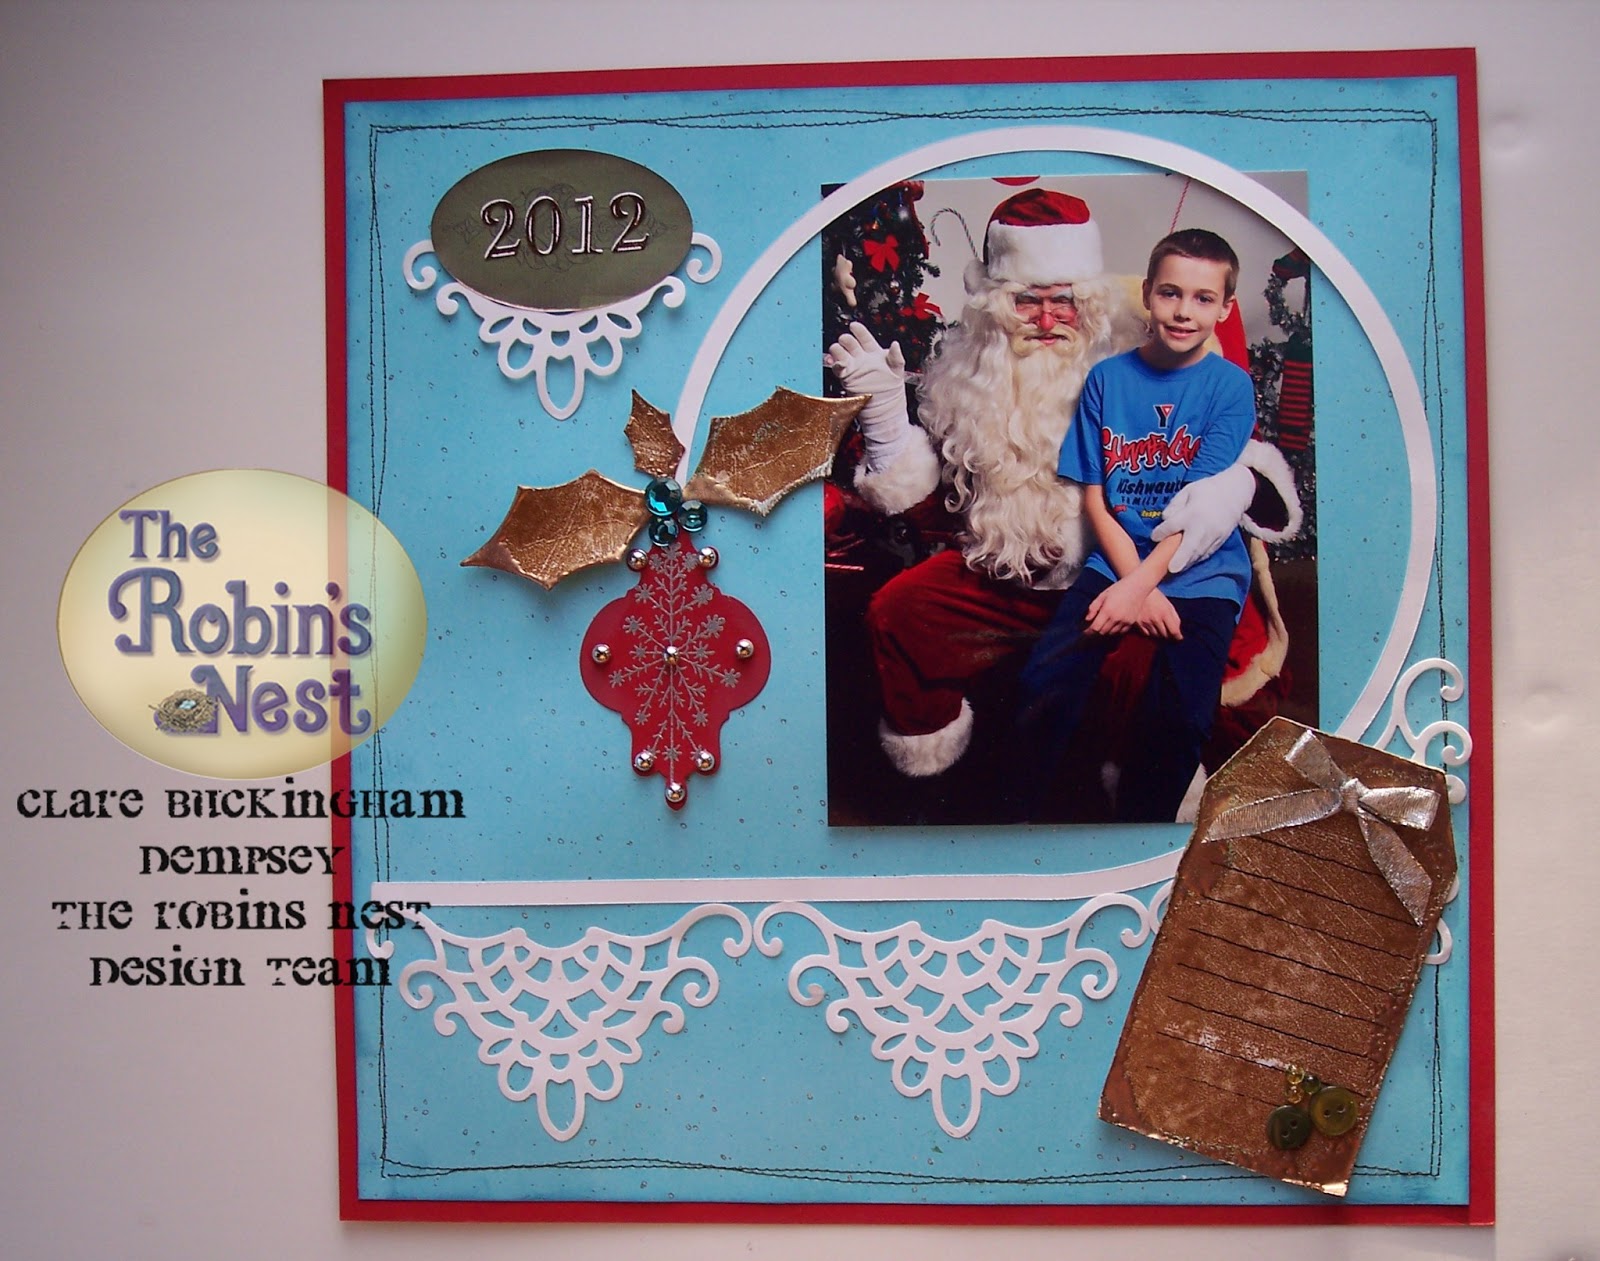
I am always faithful to scrapbook the Santa pictures and my Christmas photo cards when I get them.  So, today I am sharing this years photo with Santa page.  This is the perfect season to use all that glitters with beautiful papers from The Robin's Nest, and beautiful stamps and dies from Heartfelt Creations!  I started with a plain piece of red card stock and stitched a sheet of The Robin's Nest Teal Glitter Card stock on top.  I wish you could see this glitter card stock in person, as pictures just don't do it justice!  It is more of an embossed look with flecks of silver embossing on top of the card stock and The Robin's Nest offers this in multiple colors.  I want them all!

On top of the base papers, I cut a circle with a tail using Sure Cuts a Lot software and hung the Heartfelt Creations ornament from the circle.  To make this embellished circle cut, you can just think of the circle as a clock face and cut it at 9:00, then make a straight line from 6:00 in a clockwise direction.  The ornament was made with Heartfelt Creations HCPC 3335 Elegant Snowflake Medallion Pre-Cut Set and Heartfelt HCD 705 Creations Holly Ornament Die.  I used Silver Dew Drops from the Robin's Nest.  I also cut the holly leaves with the HCD 705 die. 
The tag is from The Robin's Nest, and I cut up the holly leaves from other tags to repeat the use of this beautiful copper colored paper. I embossed both the leaves and the tag with Piccolo's Vintage Copper Enamel Powder.  It is so rich looking with The Robin's Nest tags!
The title is made with an oval tag from The Robin's Nest Animal Tag Sticker set.  I love when I can use a sticker set in more than one theme.  The numbers are also The Robin's Nest:  gold glitter letters.
I cut four scroll shapes using Heartfelt Creations Perfect Petals Die and put three under my circle shape.  I then trimmed the top two curls off of the last shape and used it under my title.  This is a great way to repeat a design and make it the right scale for your needs.  It is also a great way to stretch your dies to cut more than one shape!  And while we are talking about dies, I want to give you a tip on how to use the beautiful detail dies you find at Heartfelt Creations.  Cover the die with clear packing tape, so that the sticky side faces the cutting edge.  Run the die through your die cutting machine with some scrap paper and you will now have the NON-stick side of the tape facing up in the die cutting side.  This will make removing your paper from the die a breeze!
Be sure to check out The Robin's Nest Store this month for specials on their card and tag kits for 20% off.  Here is a link for the sale items.  Use the coupon code cardkitpromo.  I love to make up my birthday cards for the whole year in January.  Why not use these kits to get your own cards made?


Supply List
The Robin's Nest Teal Glitter Card stock
The Robin's Nest Glitter Gold Letters
The Robin's Nest Safari Tag Kit
The Robin's Nest Black/White/Silver Dew Drops
The Robin's Nest Poinsettia Dew Drops
Heartfelt Creations Perfect Petals Die Template
Heartfelt Creations Holly Ornament Die Template
Heartfelt Creations Elegant Snowflake Medallion PreCut Set
Red Card stock
White Card stock
Stampin' Up Journaling stamp
Stazon Black Ink
Buttons
Vintage Copper Enamel Powder by Piccolo
Enamel Powder Adhesive in roll on bottle
Sure Cuts A Lot Software (optional-Circle with tail, may be cut by hand)
Ribbon
Teal Rhinestones
Silver ink
Silver embossing powder
Sewing Machine (optional you can use a marker)


Sunday, December 4, 2011

Here We Come A Caroling Blog Hop Day3


Welcome to day three of Here We Come a Caroling blog hop. You probably hopped here from Dawn's blog, but if you just stopped in and want to see every stop, please see the links on the side of my blog! On day three of the hop, I thought it might be fun to cover We Three Kings. Once again, I found sheet music on line for free! I printed it out 4 x 6 inches and trimmed off the bottom. The card is matted with black card stock, on which I put The Robin's Nest Glitter Black and White Pine tree paper. The postage stamp image of the three kings is also from The Robin's Nest.

Supplies Used:

Saturday, December 3, 2011

Here We Come A Caroling Blog Hop Day 2


Welcome to day 2 of Here We Come a Caroling Blog hop! You have probably arrived here from Dawn's blog, but if you just stopped by and wish to hop along, please see the right side of my blog for all the stops! Today's post is based on The Carol of the Bells! Someone on Pinterest had used a line of music to make a little banner. I so had to scraplift that! So, today I gave it a try with some K & Company Brenda Walton Peppermint Twist. I cut away the bell ringers and added some of The Robin's Nest Tear Drops for bell ringers instead. To make room for the custom bell ringers, I pop dotted the bells. The postage stamp was cut with Cricut's Martha Stewart Seasonal Cake Cartridge. Tie a few bows and your done. Cute, cute, cute!
Be sure to comment on yesterday's post for your chance to win. Next stop on the hop is Bug Lover Cards.

Thursday, December 1, 2011

Here We Come a Caroling with a Design Team Tryout!


Welcome to the Here We Come A Caroling Blog Hop! This hop is being sponsored by Theresa The Scrapbooking Queen. And along with the blog hop, I am trying out for The Robin's Nest Design Team. The design team tryout had very specific requirements about when to post, so I'm combining my tryout with the blog hop for a beautiful project for your family Christmas cards! All products are made by The Robin's Nest, unless specified otherwise.
I started my page with the decadent Red Paisley card stock for the background. I then used the White Snow Glitter Card stock for the large sheet music page. To get the snowflakes to pop and still show once I printed my sheet music on top, I FIRST inked it with Close to My Heart Dutch Blue ink using some daubers and sponges. After the blue ink was added, I trimmed the sheet to 8 1/2" x 11" and ran it through my printer with some free sheet music off the Internet. If you use this technique after you print on the computer, your ink will smear. so sponge ink, then printer ink. I sewed the White Snow Glitter Card stock onto the Red Paisley Card stock with green thread. If you sew on your page, pull the loose ends to the back and tie knots. I then distressed the edges with my fingernails.

The golden wreath is cut with the Martha Stewart Seasonal Cakes, in Distressed Honeycomb paper. I added Yellow Stickles to the cut and added Abracadabra Dew Drops in yellow to the center of the snowflakes for a bit more sparkle!
Yellow poinsettias were created with Sunset Diamond Dew Drops, and a bit of Xmas Red Stickles for the center. Around the yellow die cut, I sprinkled some flower sequins from Michaels with Dew Drops in the centers. I used Abracadabra for the yellow centers in the red flowers, and Pointsetta Dew Drops for the Red centers in the green flowers. The journaling block is Glitter Red Journaling block. I matted it on green side of the Glitter Black and White Pinetree paper.
To celebrate this blog hop, I am offering Blog Candy: $10.00 gift certificate and free shipping to either of my Etsy stores. Just leave a comment below about what item in my shop caught your eye and why. Please leave a method to contact you in a safe manner. For example, ssmith07 at hotmail dot com will help prevent spam! You can find my Scrapguild store HERE, and my Scrappincovers store HERE. And I must confess that with my current design team commitments my inventory is slim, so custom orders will be allowed for any prize winners! Winner will be drawn on the day after the hop: December 5, 2011.
On on to the next stop on the hop: Bug Lover Cards!


LinkWithin

Related Posts with Thumbnails